The Logs page provides the ability to view all of your driver's daily driving logs and documentation. This tab also allows you to create, update, and delete records as needed in addition to printing driving logs. Any changes made within this tab are updated and synced in near real time to the Azuga ELD Android app for the affected driver.
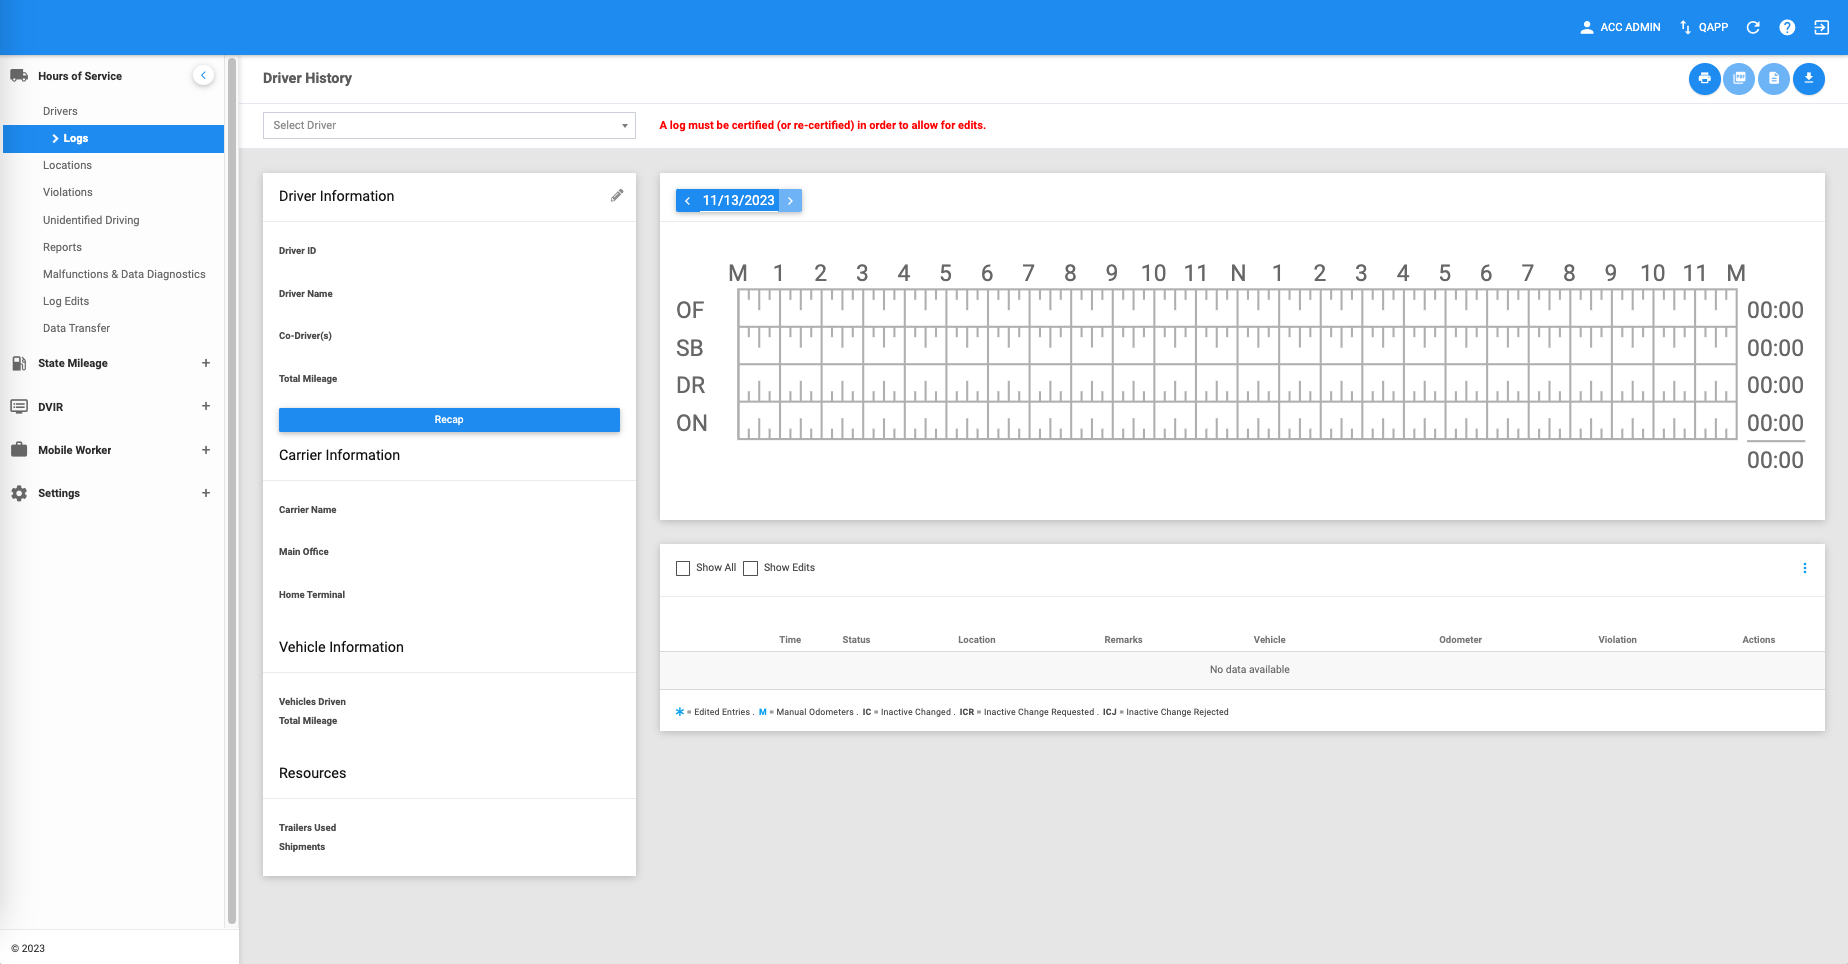
The Logs page can be manually refreshed using the Refresh button within the site header.

Log Entry Actions
1. Printing the Log entry
1.1 Click on the Export button.

1.2 The Export File dialog will then appear.
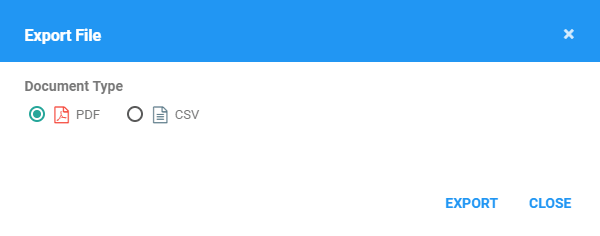
1.3 Select a document type and click Export button to print a report of the current log entry.
1.4 The report will be saved as a PDF file when you selected PDF, and as a CSV file when you selected CSV. Click here for a sample PDF report.
2. Viewing the Certified Log
2.1 Click on the Certified Log button to view the current log entry that has been certified by the driver.

2.2 The log will be opened in a new tab as a PDF file. Click here for a sample certified log report.
3. Viewing the Documents
3.1 Click on the Documents button to view your the driver’s documents.

3.2 Documents dialog will then pop-up.
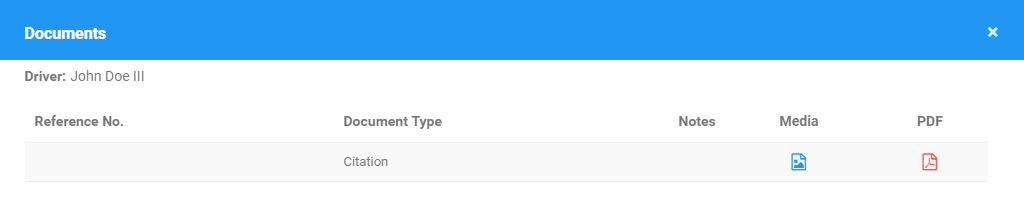
3.3 Click on the media icon.

3.4 A new tab of the browser will be opened, and the media you attached on the document will be displayed.
3.5 Click on the pdf icon.

3.6 The browser will generate an PDF report that will contain the Document Type, Reference No., Notes and the media you attached if it is an image file.
4. Viewing the Driver Log Edit Form
4.1 Click on the Print button to download the attached Driver Log Edit Action form.

Filtering the Logs table and Grid Chart
1. Filter by Driver
1.1 Click on the Select Drivers drop-down list.

1.2 Select the driver's name in the drop-down list. Drivers are grouped by their respective terminals. If a driver has an alias or Driver ID, it is shown before his/her name.
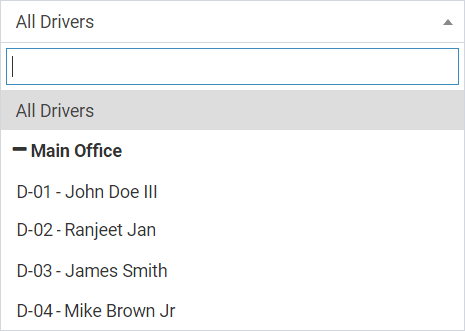
1.3 The Logs page will then be updated to only show the specific results which fall under the applied filter.
2. Filter by Date
2.1 Click on the Date Picker.
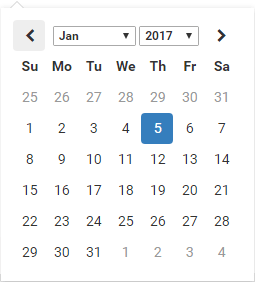
2.2 The Logs page will then be updated to only show the specific results which fall under the applied filter.
3. Filter by Event Type
By default, all Secondary Events are not displayed in the logs data table. These secondary events include: MalTimeClear, DiagMissingClear, DiagSync, PowerOff, DiagMissing, MalSync, ClearYM, MalSyncClear, MalRecord, ClearPCYM, MalPos, ClearPC, MalPowerClear, DiagSyncClear, MalTime, MalPosClear, DiagUnidentified, PowerOn, ClearPCorYM, MalPower, Login, Logout, PowerOffRP, PowerOnRP, Inter, InterRP, OnRoad, OffRoad, Remark, Certify. Only Primary or Driving Events are shown by default. These events include: OnDuty, SleeperBerth, OffDuty, YardMoves, WaitingAtSite, Driving, PersonalConveyance.
Definitions for each type of events are explained in section E: 9
3.1 Click on the Show All Events option to toggle the display of Secondary Events. Unchecking the option will filter back to Primary or Driving Events.
3.2 The Logs page will then be updated to only show the specific results which fall under the applied filter.
3.3 Click on the Show Edits checkbox to show modified events on the history list marked with an (*) regardless if the event is in AOBRD or ELD Regulation Mode. Unchecking the checkbox will filter back to hide the (*) and modified events that are in AOBRD Regulation Mode.

3.4 The Logs page will then be updated to only show the specific results which fall under the applied filter.
Current Log Information
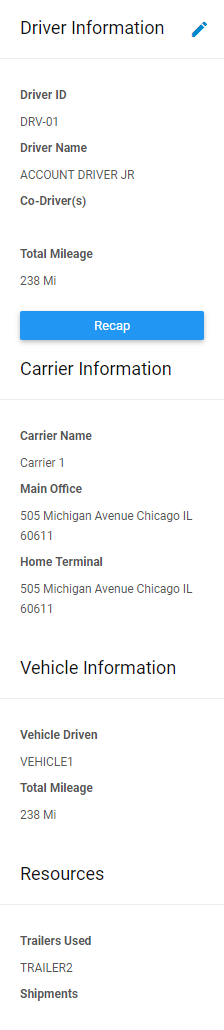
On the left side, the current log and the associated records with it are summarized. They are categorized by Driver Information, Carrier Information, Vehicle Information and Resources. The only editable information are Co-Driver(s) and Trailers Used.
1. Editing the Current Log
1.1 Click on the Edit button below the Log Information.

1.2 The Driver Log Form dialog will appear.
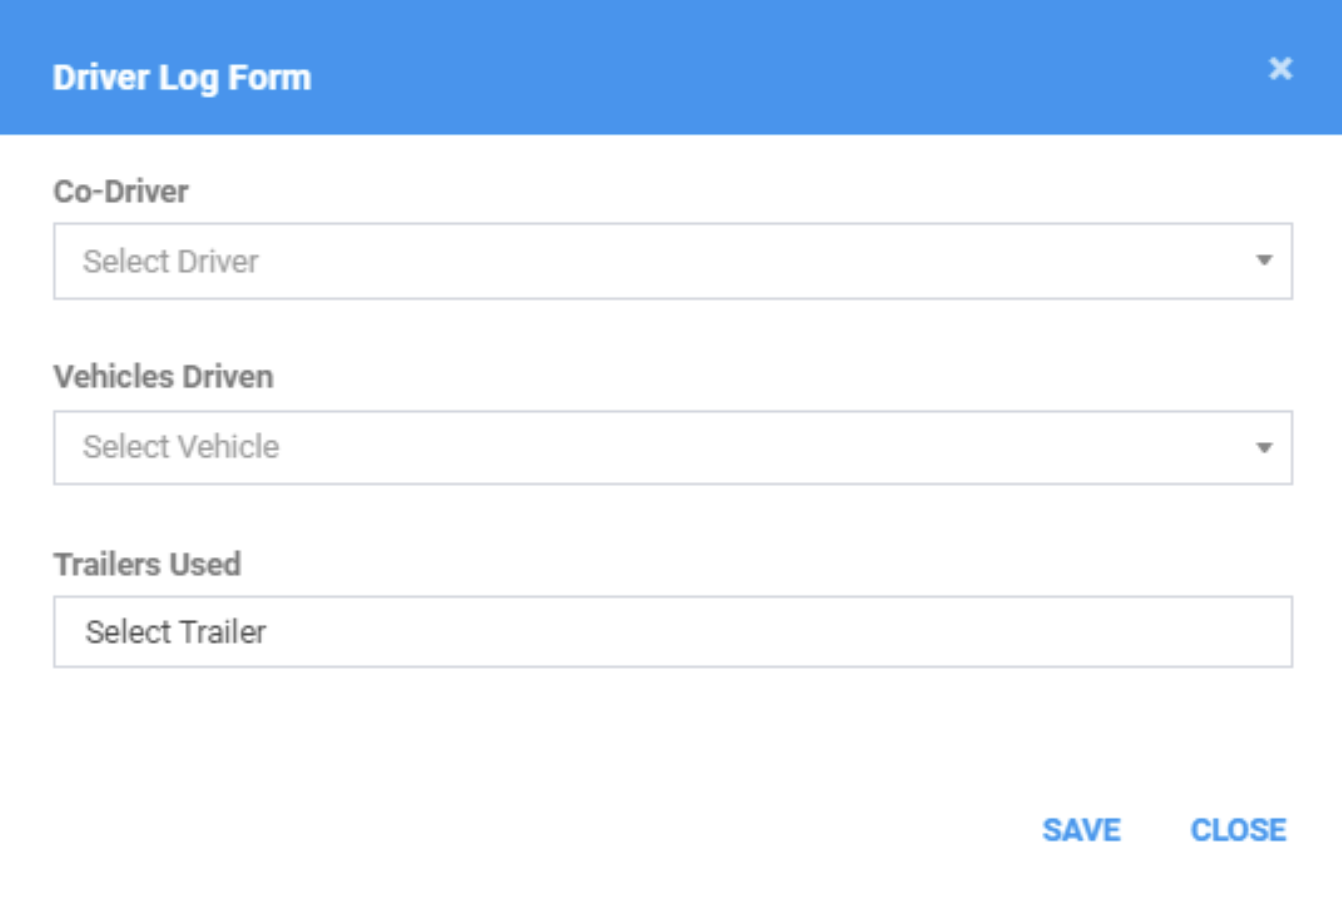
1.3 Fill in the fields you want to update by clicking the dropdown buttons.
1.4 Click on the Save button to SAVE the new Log information.

1.5 Or click X or CLOSE to discard the changes you made.
2. Recap
2.1 Click on the Recap button on the Log information

2.2 The Recap dialog will appear containing the hours accumulated by the driver for the last 14 days.
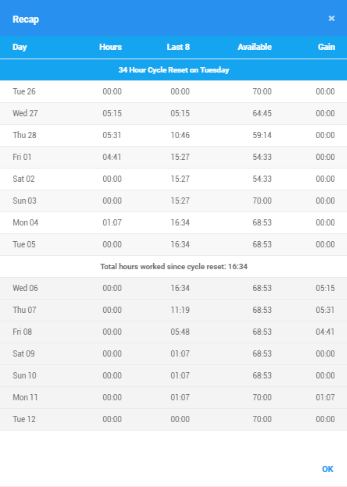
2.3 Click the OK or X button to close the dialog
Current Log’s Grid Chart
The Grid Chart is the visual representation of the series of events that have occurred over the current log period. Events are recorded as lines on the grid chart with respect to the time it occurred, ended and its duration. Below are the contents of the Grid Chart.
1. Header
1.1 The Start Time of Day of the Current Log.

1.2 The Cycle used by the driver.
2. Grid Chart
2.1 Contains the line over time representation of the events. The line color varies per the following conditions:
- Solid Green is the default line color.
- Solid Red lines denote violations that occur under the US Region.
- Solid amber lines denote violations that occur under the Canada Region.
- Dashed amber lines denote Personal Conveyance events.
- Dotted amber lines denote Yard Moves events.
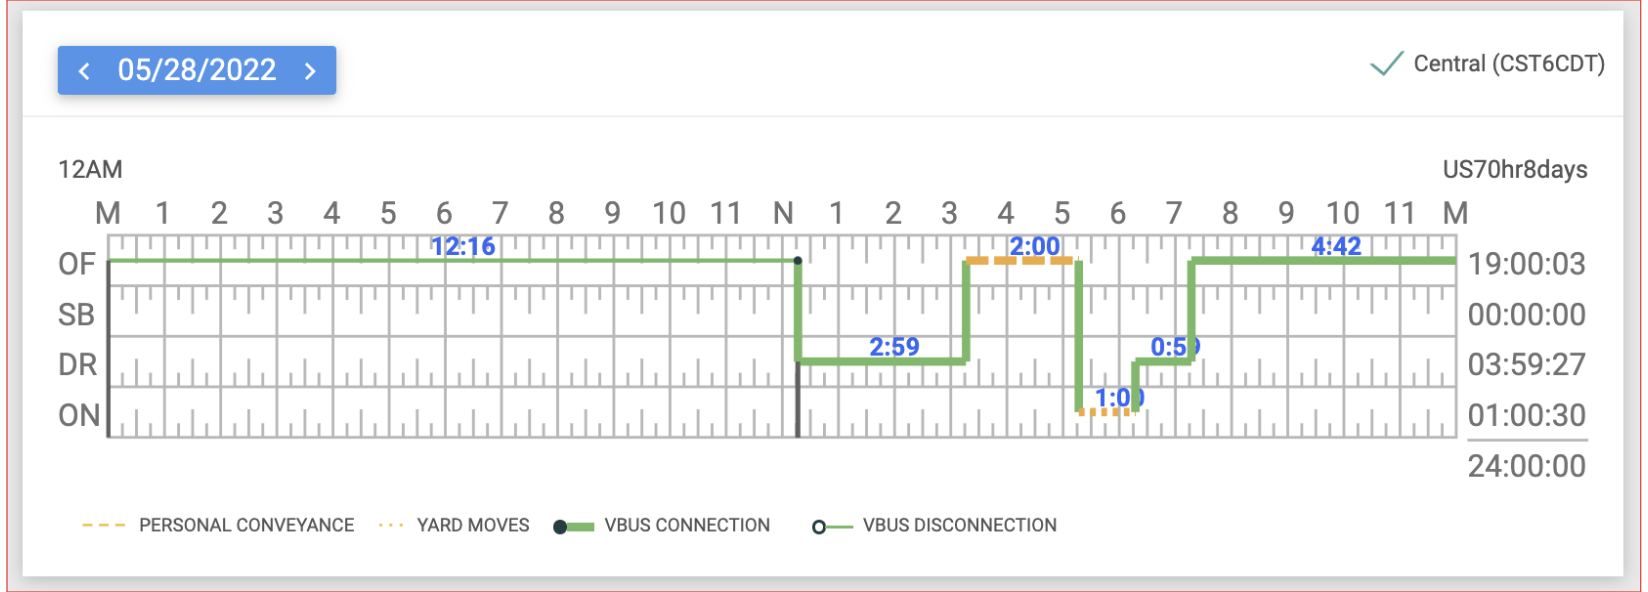
2.2 On grid chart regardless of the events, grid line thickness and thinness indicates as follows:
- When VBUS Devices is connected, the proceeding grid line will be in thick line.
- When VBUS Devices is disconnected, the proceeding grid line will be in thin line.
- When VBUS Devices is connected, the proceeding grid line will be in thick line.
2.3 The legends for VBUS Connection and VBUS Disconnection will only display for drivers whose using an app version from 1905.190430 up to the latest app versions.
- Small solid circle indicates at which point VBUS connection occurs.

- Small hollow circle indicates at which point VBUS disconnection occurs.

- Small solid circle indicates at which point VBUS connection occurs.
2.4 Click anywhere on the Grid Chart to zoom in.
2.5 Hover over a specific event to highlight it and its corresponding event in the Events History List below the Grid Chart.
- 2.6 To display the seconds in time in the grid chart, enable the 'Display Time With Seconds' option in the app.
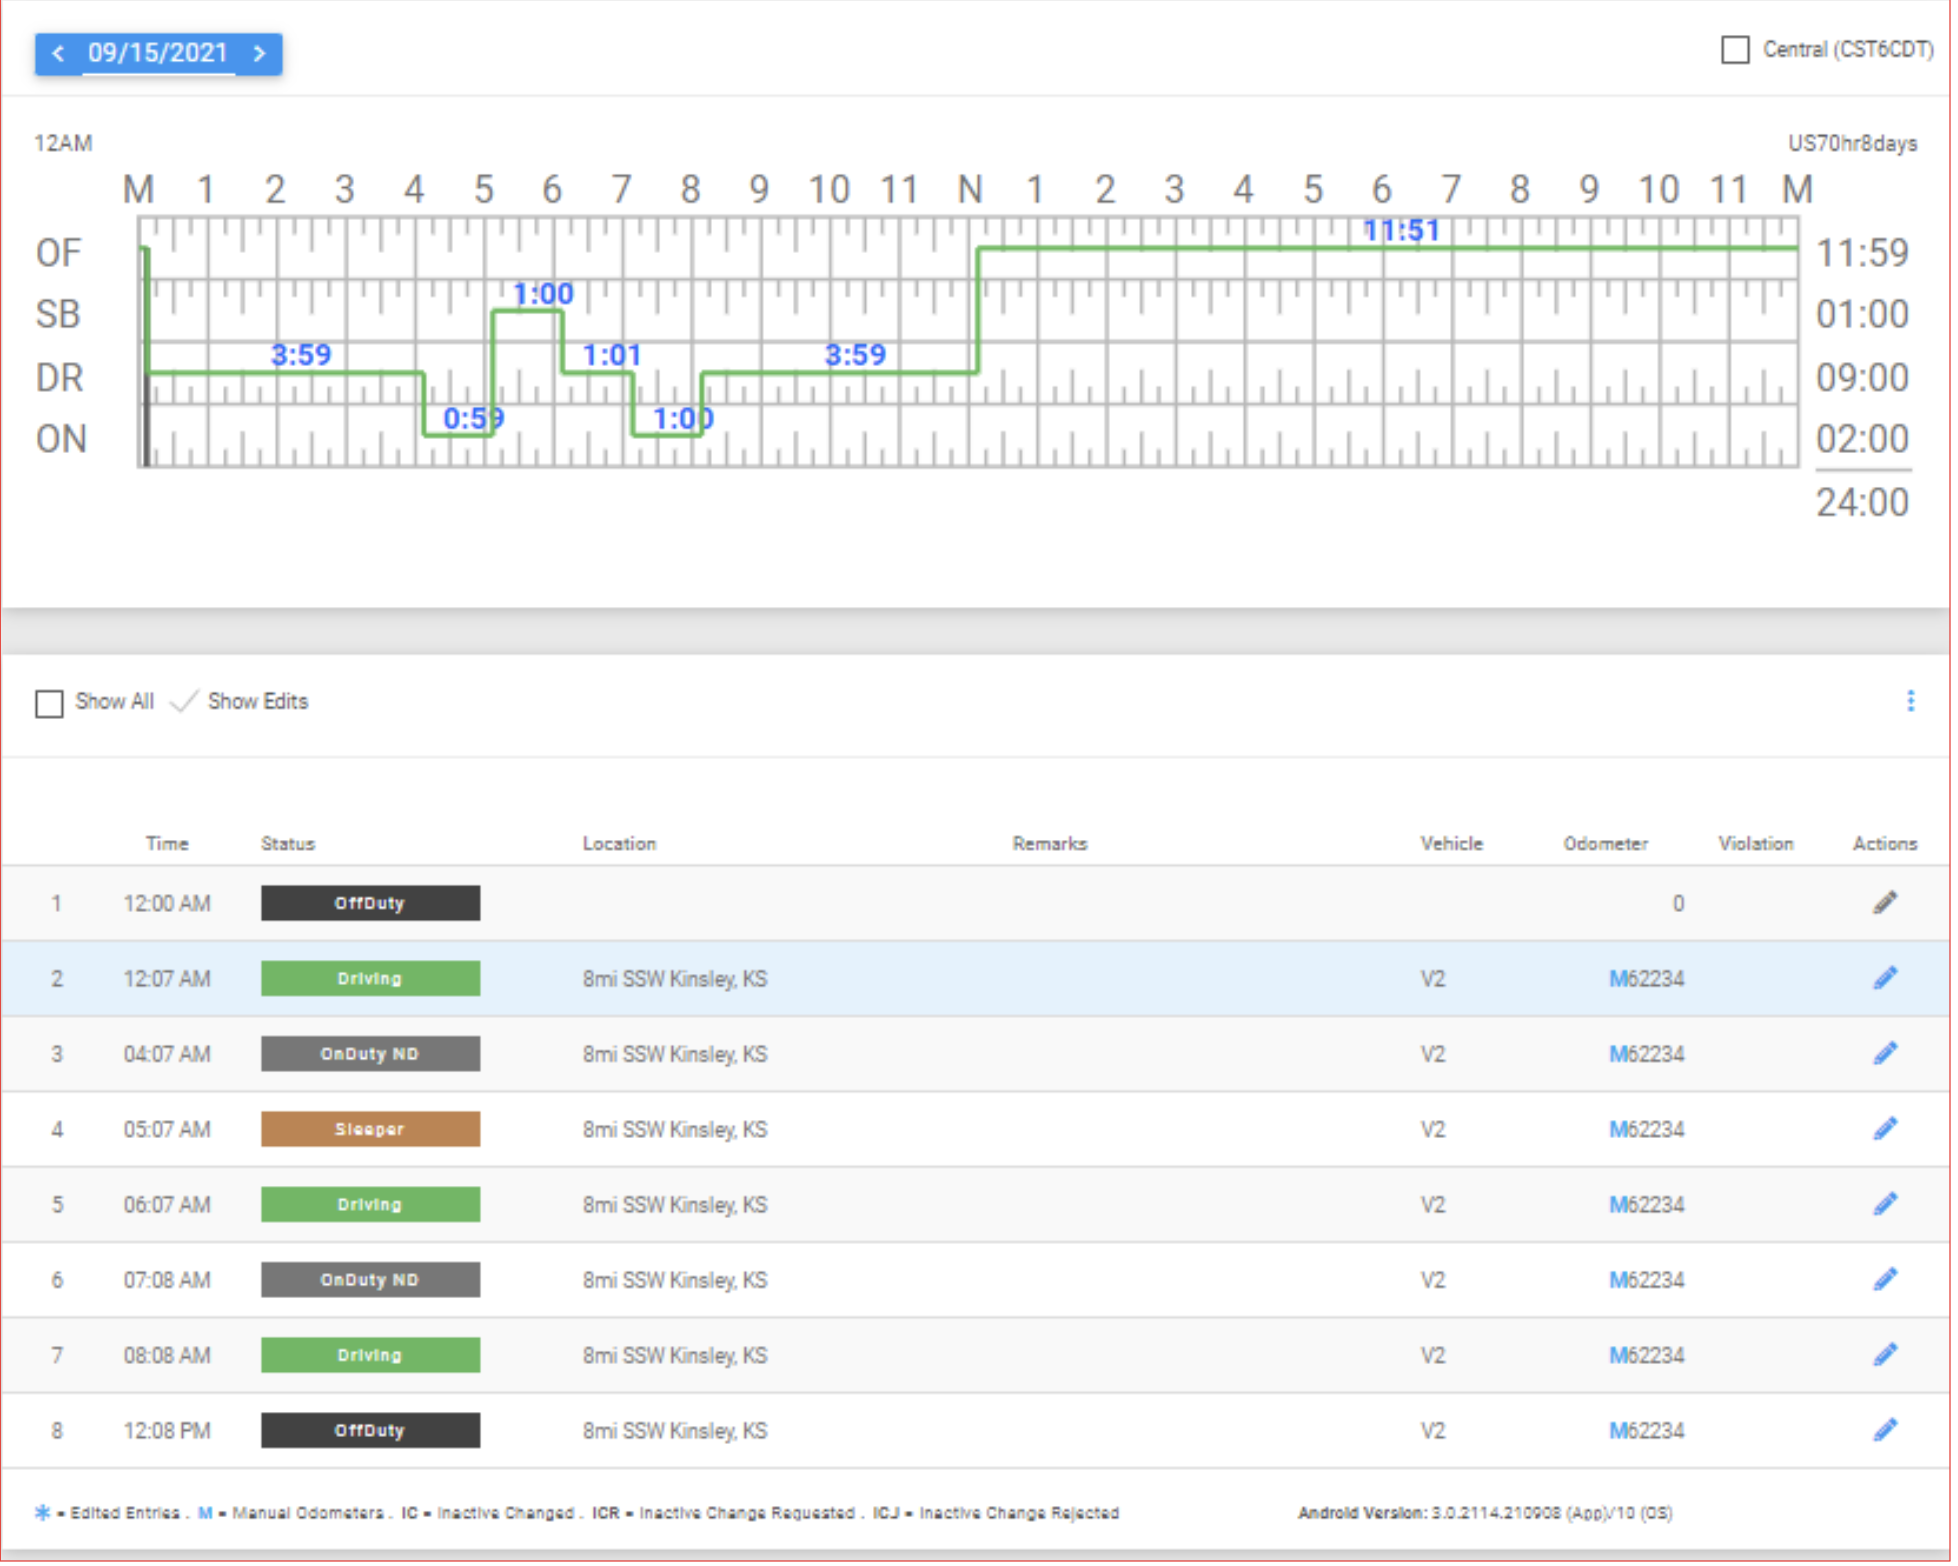
3. Footer
3.1 Personal Use and Yard Moves legend.

Exceptions for the current log - even if the exception is removed on the current log, it will still be listed throughout the day under the ‘Exceptions used’.

Events History table
To Edit or Update driver’s logs click the three-dot button is visible found at the top left corner of the Events History table. Clicking this button will allow you to access additional features:

3.1 Multiple Edit
You can edit multiple driver history records for a driver one at a time. Also this allows you to use a single reason for all the edit made. Automatic driving events cannot be edited so they will not appear in the dialog.
3.1.1 Click on the Multiple Edit button.

3.1.2 The Multiple Edit Log dialog will display.
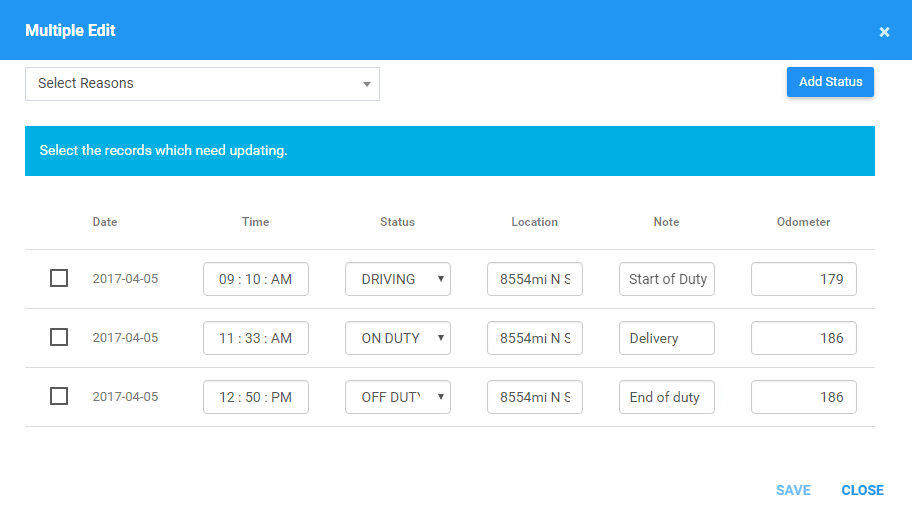
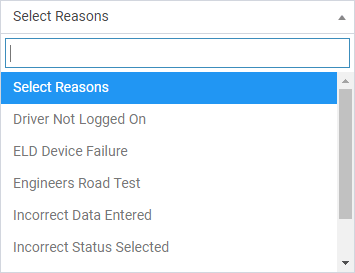
3.1.3 Select a single Reason for Edit for all the edits you will make.
3.1.4 You can also add statuses in addition to editing multiple statuses by clicking on the Add Status button. This will automatically create a status row in the bottom.
3.1.5 Editing a log entry
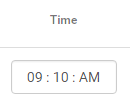
Modify the Time by clicking on the field
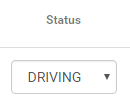
Modify the Status by clicking on the field.
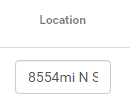
Fill in or Modify the Location field Input Location.
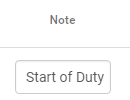
Fill in or Modify the Notes field Notes Location.
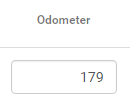
You're not allowed to Fill in or Modify the Odometer field.
3.1.6 Saving the modified log entries
Before saving you can uncheck the options on the left of the entries that you don’t want to update.
Click on the Save button to successfully save the changes you made to the log entry.

3.2 Upload Driver Log Edit Form
3.2.1 Click on the Upload Form button.

3.2.2 The Upload Driver Log Edit pop-up dialog will then show.
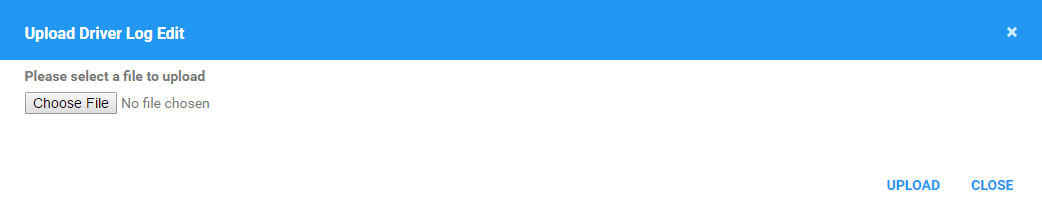
3.2.3 Click on the Choose File button to browse for the file to upload.
Note: You can only upload a single file.
3.2.4 Click on the Upload button to successfully upload the form. Click Close to cancel the upload.
3.2.5 After uploading the file, you will then see this button replacing the Upload Form button.
3.2.6 Click on the View Form button to view the uploaded file (can be .pdf, .jpg, .doc, .csv).

3.3 Add Shipment
3.3.1 Click on the Shipment button.

3.3.2 The Shipment Dialog pop-up dialog will then show. Fill up the Shipping Number field.
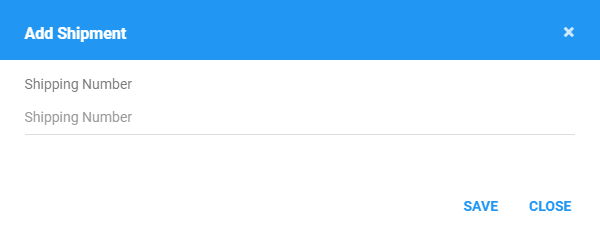
3.3.3 Click on the Save button to successfully save the shipment. Click X to disregard the edit.

3.4 Add Remark on the Log Entry
3.4.1 Click on the Remark button.

3.4.2 The Add Remark Dialog pop-up dialog will then show. Fill up the fields.
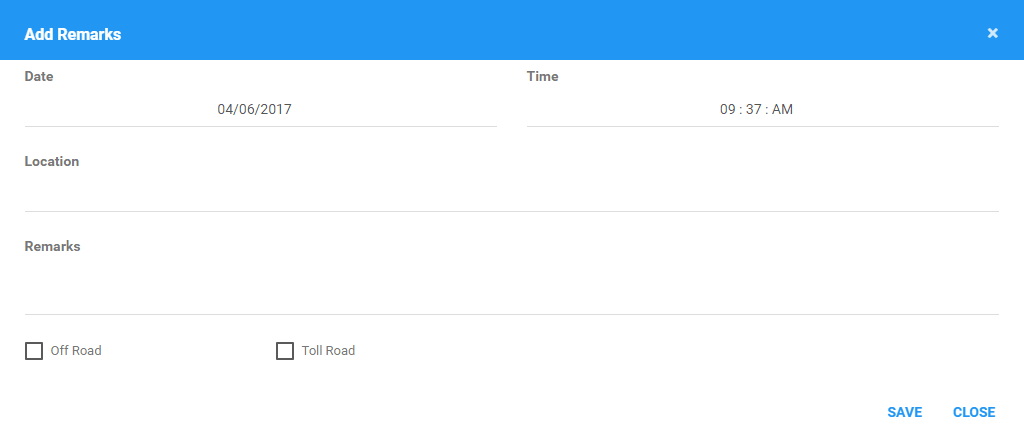
3.4.3 Enable the Off Road or the Toll Road button to indicate that the driver has entered the specified road and to exclude the accumulated miles from the IFTA calculations. A Note of "Off Road" and "Start Toll Road" will automatically be generated, when enabling the corresponding option. Disable the checkboxes to indicate that the driver has resumed driving in a normal road. A Note of "On Road" and "End Toll Road" will automatically be generated, when disabling the corresponding option.

3.4.5 Click on the Save button to successfully save the shipment. Click X to disregard the edit.

3.5 Add Exceptions
3.5.1 Click on the Exceptions button.

3.5.2 The Add Exceptions Dialog pop-up dialog will then show. Check the exception(s) you want to add.
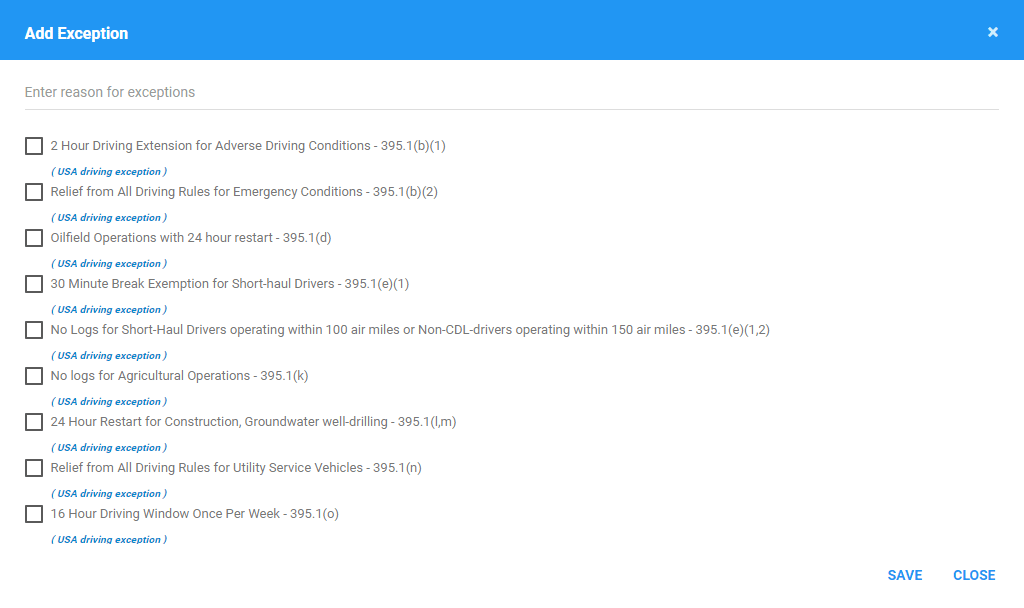
3.5.3 Fill up the text field for the custom Reason for Exceptions.

3.5.4 Click on the Save button to successfully save the shipment. Click X to disregard the edit.

3.5.5 The checked exceptions will then be added on the events history list as a Remark event stating “Exceptions Added: [List of exceptions]”.
3.6 Add Single Status
3.6.1 Click on the Status button.

3.6.2 The Create Status Dialog pop-up dialog will then show.
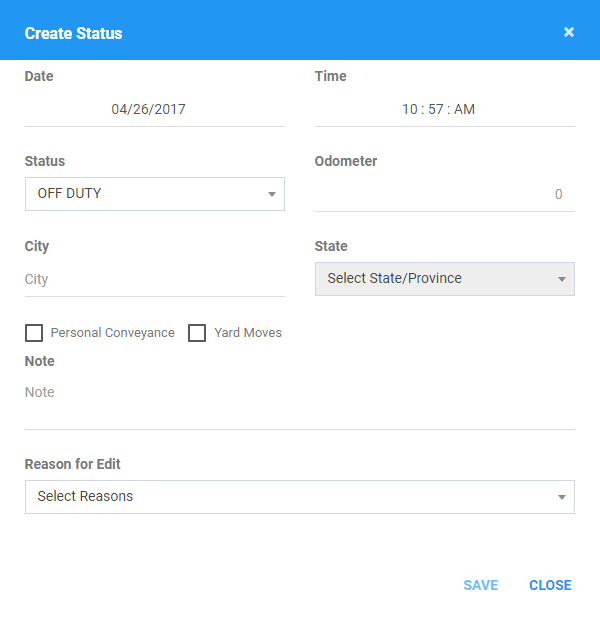
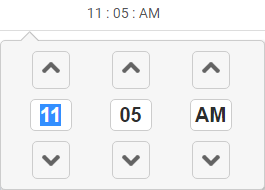
3.6.3 Select the Time for the status.
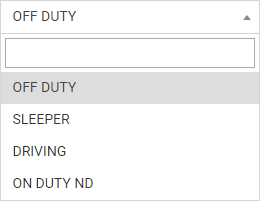
3.6.4 Select the Status from the drop-down list.
3.6.5 You can't add or edit a value for the Odometer field.
3.6.6 Fill in the City field. This is required to enable the State field.
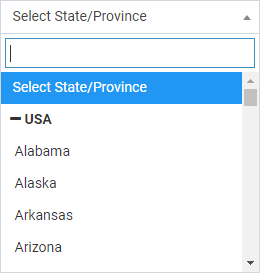
3.6.7 Select the name of the State from the drop-down list.
3.6.8 You can check the following options to enable special driving events.
Personal Conveyance - Once checked the Yard Moves checkbox will be disabled. Selection of this option will be recorded within the events history.
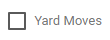
Yard Moves - If this is enabled, the status will be set to Off Duty automatically and will disable the Personal Conveyance check box. Selection of this option will be recorded within the events history.
Note:
These events can also be cleared from the portal, disabling these options will record the following in the events history list accordingly: ClearYM/IC and ClearPU/IC.
3.6.9 Fill in the Note field.

3.6.10 Select a Reason Code from the drop-down list.
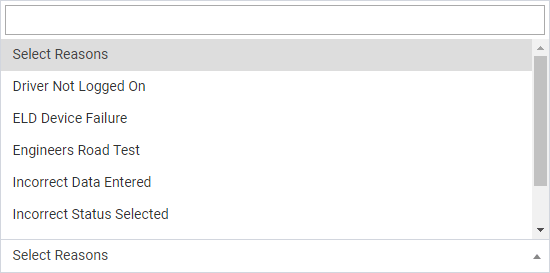
3.6.11 Click on the Save button to successfully add the status. Click Close to disregard the edit.

3.6.12 The Status will then be added on the events history list.
3.7 Events History List
3.7.1 Hover over a specific entry to highlight it and its corresponding event in the Grid Chart below the Events History List.
3.7.2 Hover over a Violation Icon to show its description.

3.7.3 Click on the Edit Status icon. Automatic events created by the app are not editable except for Driving event.

3.7.4 The Update Status dialog will then show. Modify the fields as you would do in Adding Single Status.
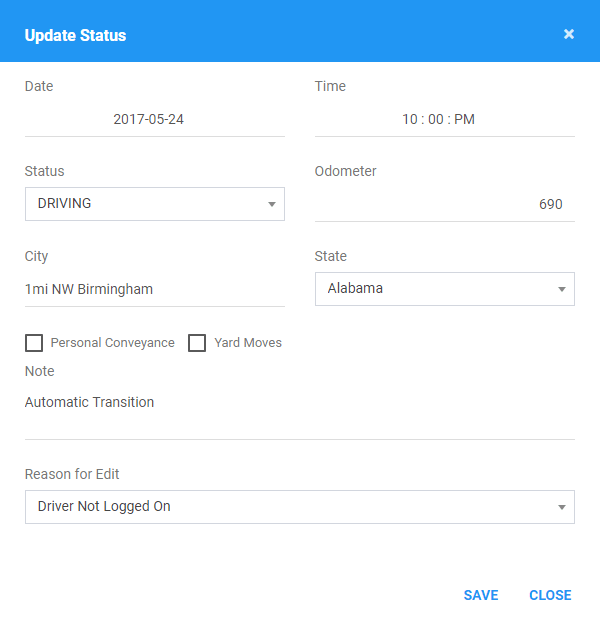
3.7.5 Click on the Save button to successfully update the status. Click Close to disregard the edit.

3.7.6 For Automatically created Driving events, the Update Note dialog will show instead of the Update Status dialog. Modify the Note field
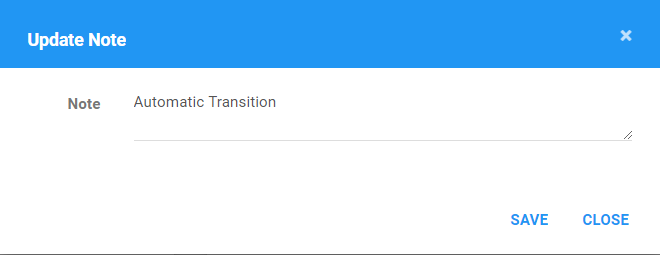
3.7.7 Click on the Save button to successfully update the status. Click Close to disregard the edit.
3.7.8 For Automatically created Driving events for Drivers that has a Co-Driver(s), the Reassign Driving Time dialog will show instead of the Update Status dialog. Modify the Note field and/or Reassign event to a Co-Driver.
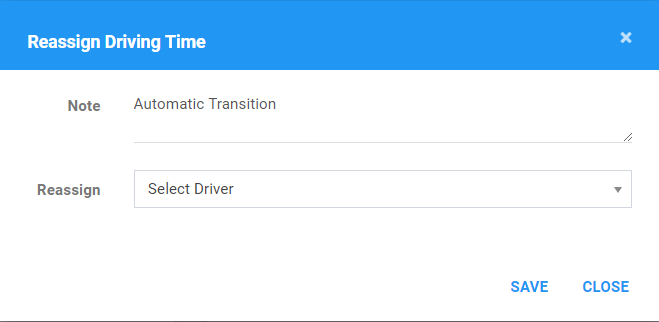
3.7.9 Click on the Save button to successfully update the status. Click Close to disregard the edit.
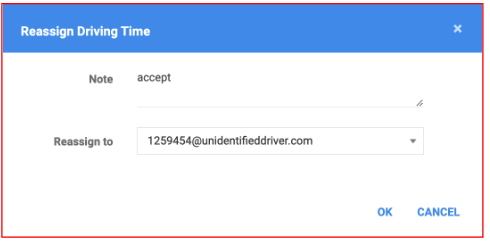
3.7.10 The Reassigned and Accepted Unidentified Driving event for Driver, the support personnel has the ability to reassign the Unidentified Driving Event back to the Unique Unidentified Driver’s Account. After reassigning the unidentified driving event,it needs to be confirmed using the Driver’s account to grant the reassigning of driving event to the unidentified driver’s account
3.8 Grid View Editing
When Logs Editing Mode is set to Grid View Editing in Account Settings -> Account Controls, a grid view editing form will display upon clicking on the Insert Past Status button, or clicking on the Edit Status icon to any of the existing log events.
3.8.1 Click on Change Current Status button.

Note: Change Current Status button is only available in current log date.
3.8.2 The Create Status Dialog pop-up dialog will then show.
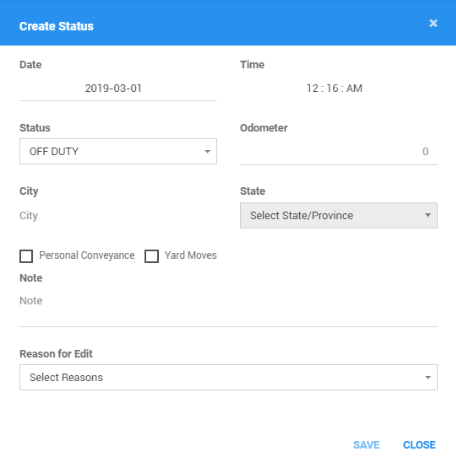
3.8.3 Fill in the necessary fields.
3.8.4 Click on the Save button to successfully add the status. Click Close to disregard the edit.
3.8.5 The status will then be added on the event history list.
3.8.6 Click on Insert Past Status button.

3.8.7 The grid view editing form for will then display.
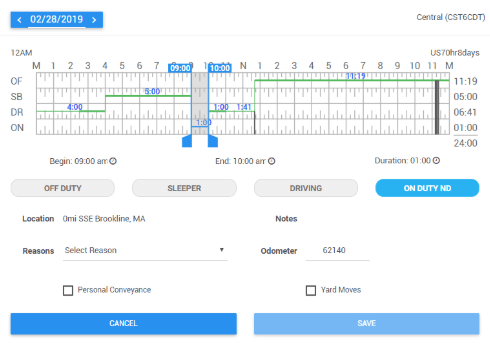
Note: Grid view editing form will also display when clicking Edit Status icon button on any of the existing log events.
3.8.8 Drag the sliders on the grid to adjust the begin time or end time of the event to be updated or:
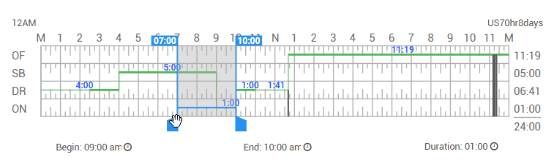
3.8.9 Click on Begin or End field and enter time to update. Press on Enter key to save changes.

3.8.10 Select Off Duty , Sleeper Berth , Driving or On Duty ND button.

3.8.11 Select a reason for the edit from the Reason drop-down list.
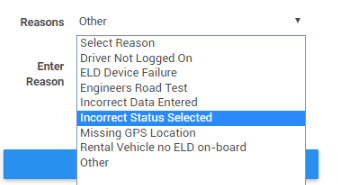
3.8.12 Fill in other required fields.
3.8.13 Click on Save button to successfully update the status. Click Cancel button to disregard edit.

Notes:
All log events that have been manually created or amended, will be displayed with an asterisk against it in the log events list depicting that it has been edited.
Upon editing a past event, the Note field should not be empty and must contain at least 4 characters when filled out.
3.9 Events Legend
3.9.1 When the Motor Carrier requests an edit or add on the driver's records electronically, it informs the driver by displaying the Pending Request(s) dialog in the app. Modified events marked with an (*) cannot be edited unless accepted by the driver on the HOS Application.
3.9.2 However, in the portal, the added or edited event displays on the Events History with these marks

Inactive Change Request (ICR) - means the the requested event still needs an approval from the driver.
Inactive Change Rejected (ICJ) - means that the requested edit has been rejected by the driver.
Inactive Change (IC) - means that these events have been edited and replaced by the driver in the app, hence they are inactive.
3.9.3 When a driver used an android application, the Android operating system and HOS application versions will appear beside the event legend. If a driver used an iOS operating system and HOS application versions will appear beside the event legend.
3.10 Status Definitions
3.10.1 Driving events:
OffDuty
Sleeper
Driving
OnDuty ND
Well Site : Waiting at Well Site (for oilfield/construction exception)
3.10.2 Remark Events:
Authentication Remark – This is the login to the application by the driver
Unauthenticate Remark – This is the Logout of the application by the driver
Co-driver login Remark – Login of a Co-Driver in a Primary Driver’s log
ELD Connection – Connection to the Engine Control Device
ELD Disconnection – Disconnection of the Engine Control Device
Switch Vehicle Remark
Switch Trailer Remark
Switch Vehicle and Trailer Remark
Start Hour of the day Changed Remark
State/Country Border Crossing Remark
Off Road Remark – When drivers moves to Off Road mode
On Road Remark – When driver moves back to On Road after Off Road
Start Toll Road Remark – When drivers moves to Toll Road mode
End Toll Road Remark – When driver stops driving on Toll Road mode
3.10.3 Intermediate Events
Inter : Auto 60 Min Location – Every hour an Intermediate event must be written while in a Driving state to capture location/odometer/engine hours
3.10.4 Personal Conveyance and Yard Moves:
PersonalUse : Personal Use
YardMoves : Yard Moves
ClearPU : Clear Personal Use
ClearYM : Clear Yard Moves
3.10.5 Certification:
Certify – Shows the time that a particular day’s log was Certified by the Driver
3.10.6 Power Cycle:
PowerOn : Power on of the vehicle when connected to ECM device
PowerOff : Power off of the vehicle when connected to ECM device
3.10.7 Diagnostic Events & Malfunctions:
MalPower : Power Malfunction
MalSync : Engine Synchronization Malfunction
MalTime : Timing Malfunction
MalPos : Position Malfunction
MalRecord : Data Recording Malfunction
MalTransfer : Data Transfer Malfunction
MalOther : Other Malfunction
MalPowerClear : Power Malfunction Cleared
MalSyncClear : Engine Synchronization Malfunction Cleared
MalTimeClear : Timing Malfunction Cleared
MalPosClear : Position Malfunction Cleared
MalRecordClear : Data Recording Malfunction Cleared
MalTransferClear : Data Transfer Malfunction Cleared
MalOtherClear : Other Malfunction Cleared
DiagPower : Power Diagnostic
DiagSync : Engine Synchronization Diagnostic
DiagMissing : Missing Required Data Elements Diagnostic
DiagTransfer : Data Transfer Diagnostic
DiagUnidentified : Unidentified Driver Diagnostic
DiagOther : Other Diagnostic
DiagPowerClear : Power Diagnostic Cleared
DiagSyncClear : Engine Synchronization Diagnostic Cleared
DiagMissingClear : Missing Required Data Elements Diagnostic Cleared
DiagTransferClear : Data Transfer Diagnostic Cleared
DiagUnidentifiedClear : Unidentified Driver Diagnostic Cleared
DiagOtherClear : Other Diagnostic Cleared
Was this article helpful?
That’s Great!
Thank you for your feedback
Sorry! We couldn't be helpful
Thank you for your feedback
Feedback sent
We appreciate your effort and will try to fix the article