The DVIR History provides the ability to view all of your driver's DVIR on different equipment. This page also allows you to update the DVIR details such as certifying the repairs made on the defective items. Any changes made within this page are updated and synced in near real time to the Azuga ELD Android app.
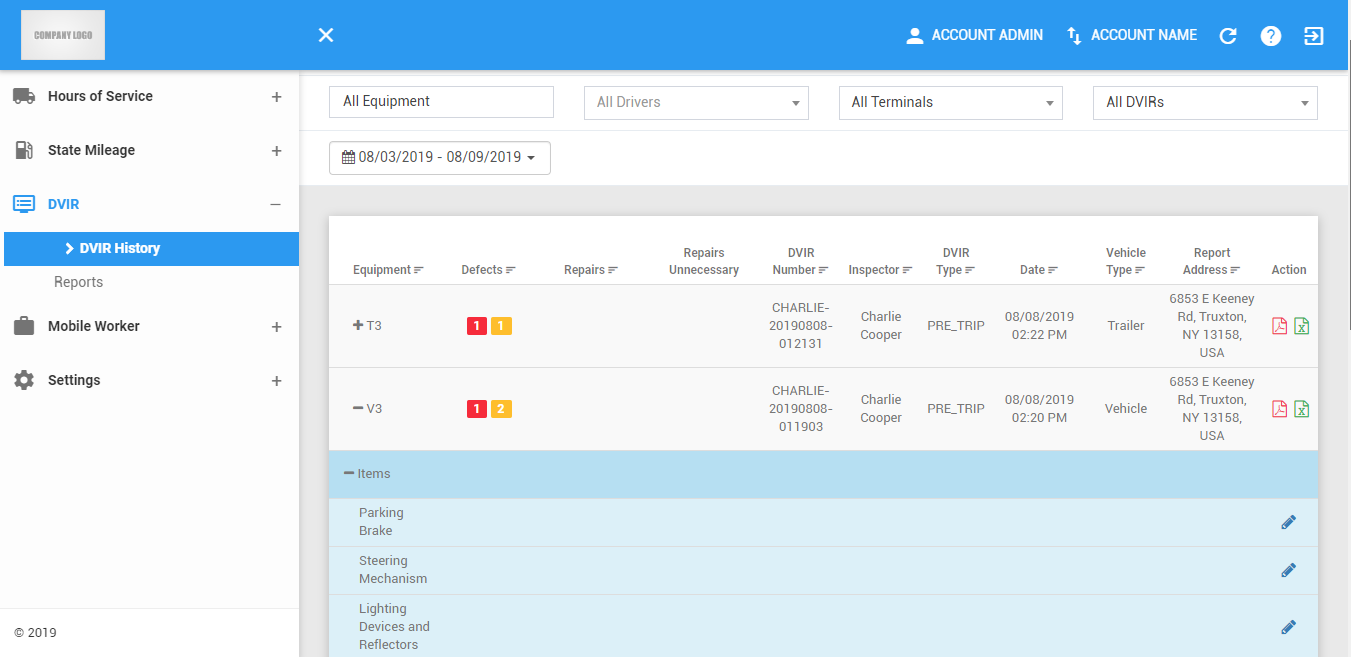
The DVIR History page can be manually refreshed using the Refresh button within the site header.

Filtering the DVIR History table
1. Filter by Equipment
1.1 Select at least 1 or more Equipment in the drop-down list.

1.2 The DVIR History table will then be updated to only show the specific results which fall under the applied filter.
2. Filter by Driver
2.1 Select a Driver in the drop-down list. Drivers are grouped by their respective terminals. If a driver has an alias or Driver ID, it is shown before his/her name.

2.2 The DVIR History table will then be updated to only show the specific results which fall under the applied filter.
3. Filter by Terminal
3.1 Select a Terminal in the drop-down list.

3.2 The DVIR History table will then be updated to only show the specific results which fall under the applied filter.
4. Filter by Defect Type
4.1 Select a Defect Type in the drop-down list.

4.2 The DVIR History table will then be updated to only show the specific results which fall under the applied filter.
5. Filter by Date
5.1 Select a Date in the date-picker to filter records that have been completed on the date filter.

5.2 The DVIR History table will then be updated to only show the specific results which fall under the applied filter.
DVIR History table
1. Sorting DVIRs
1.1 The records can be sorted by the following fields.
- Equipment
- Number of Defects
- Repairs
- Repairs Unnecessary
- DVIR Number(DVIR Number is formatted to LASTNAME-YYYYMMDD-HHMMSS)
- Inspector
- DVIR Type
- Date
- Vehicle Type
- Report Address
1.2 Click the column header title in order to sort the records either in ascending or descending order.

1.3 The DVIR History table will then be updated with the records sorted according to the column header that was clicked.
2. Viewing the DVIR’s details
2.1 DVIR Type indicates the type of inspection done by the driver. This can either be:
- PRE_TRIP
- POST_TRIP
- AD_HOC
2.2 Click on the row to expand or collapse the row. Expanding the row will then display the equipment areas and items.

2.3 Severity levels represent the total number of defective items found on the vehicle during inspection, these defects are then categorized into three according to their priorities: Major or Minor. These icons displays on every equipment shown on the table:

- Red for Major

- Yellow for Minor

- Red for Major
2.4 The repairs column displays a Wrench Icon on every defective items ONLY. The icon displays in grey color if the item repair isn't necessary and green if it is repaired.

3. Editing a DVIR Record
3.1 Click on the Edit icon of a specific point on a DVIR record.

3.2 The Update Details dialog will then appear.
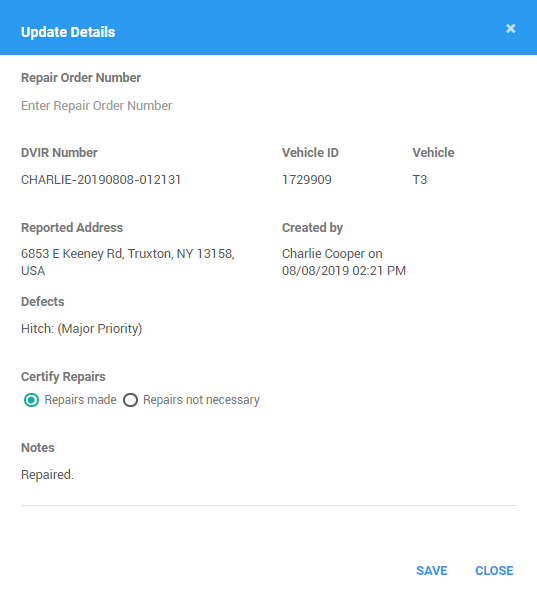
3.3 Enter the Repair Order Number

3.4 Select a checkbox to certify if repairs had been made to the point.
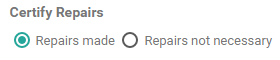
3.5 Enter an optional note to when you update a point.

3.6 Click the Save button successfully save the update. Click the Close button of the modal to cancel the edit.

Note: After doing updates on the DVIR details of each equipment item, the updates on the portal will then reflect to the app.
Was this article helpful?
That’s Great!
Thank you for your feedback
Sorry! We couldn't be helpful
Thank you for your feedback
Feedback sent
We appreciate your effort and will try to fix the article