Overview
The revamped Users Admin pages provide a streamlined and centralized way to manage people and access within the Azuga web platform. With an improved layout and simplified workflows, administrators can quickly create, search, edit, and manage both driver and portal user records with greater efficiency and visibility.
These updates introduce a cleaner interface, faster filtering and search capabilities, and more structured data entry forms, making day-to-day administration easier and more consistent.
This guide explains how to navigate and use the updated Drivers and Users Admin pages effectively.
Accessing Users Page
- Log in to the Azuga Fleet web platform.
- Navigate to Admin >> Users >> Users (New).
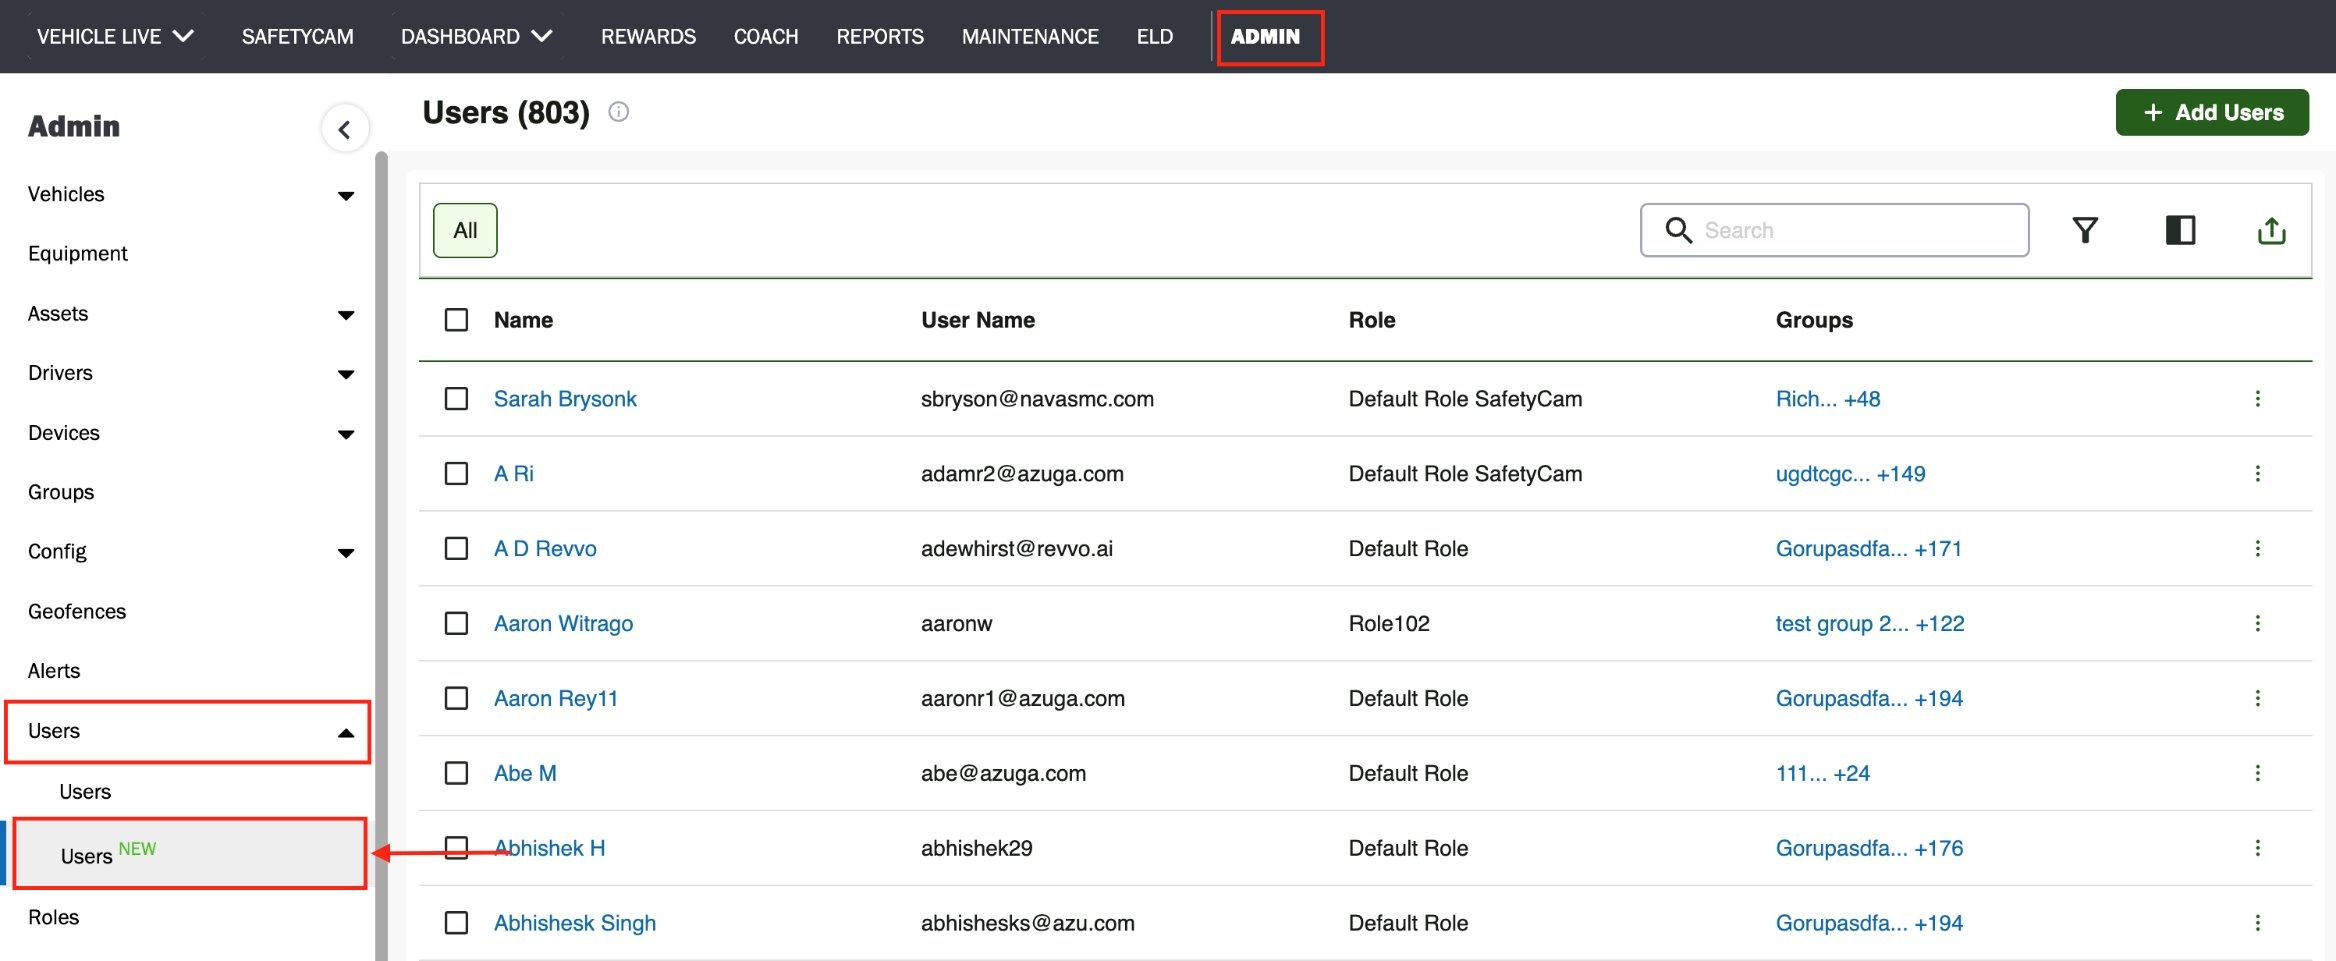
The Users page shows the complete list of users available in the system along with their usernames, assigned roles, and group associations.
At the top of the page, administrators can quickly view and use:
- Total user count
- Search bar to find users by name or username
- Filter option to narrow results
- Add Users button to create a new user
- Export option to download the user list
Users Detailed View
You can open a user’s detailed profile by clicking on any user row in the Users table. This page gives a complete overview of the selected user, including account details, role, and group access.
The User Header at the top stays visible and shows key information such as username, assigned role, and group count.
Top Actions Available:
Edit – Update user details and permissions
More Options (⋮) – Access additional actions (Provides the option to delete the user).
The page is divided into simple sections, so user information is easy to review and manage:
- Overview — Displays core account details such as user type, role, contact info, time zone, and last login activity
- User Information — Shows identifiers and system-level data like User ID and API key (if enabled)
- Associated Groups — Lists all groups the user is assigned to, with search and expand options for quick navigation
- Access & Role — Highlights the assigned role and permission scope for the user
Each section can be expanded or collapsed, allowing you to focus only on the required details and keep the page uncluttered.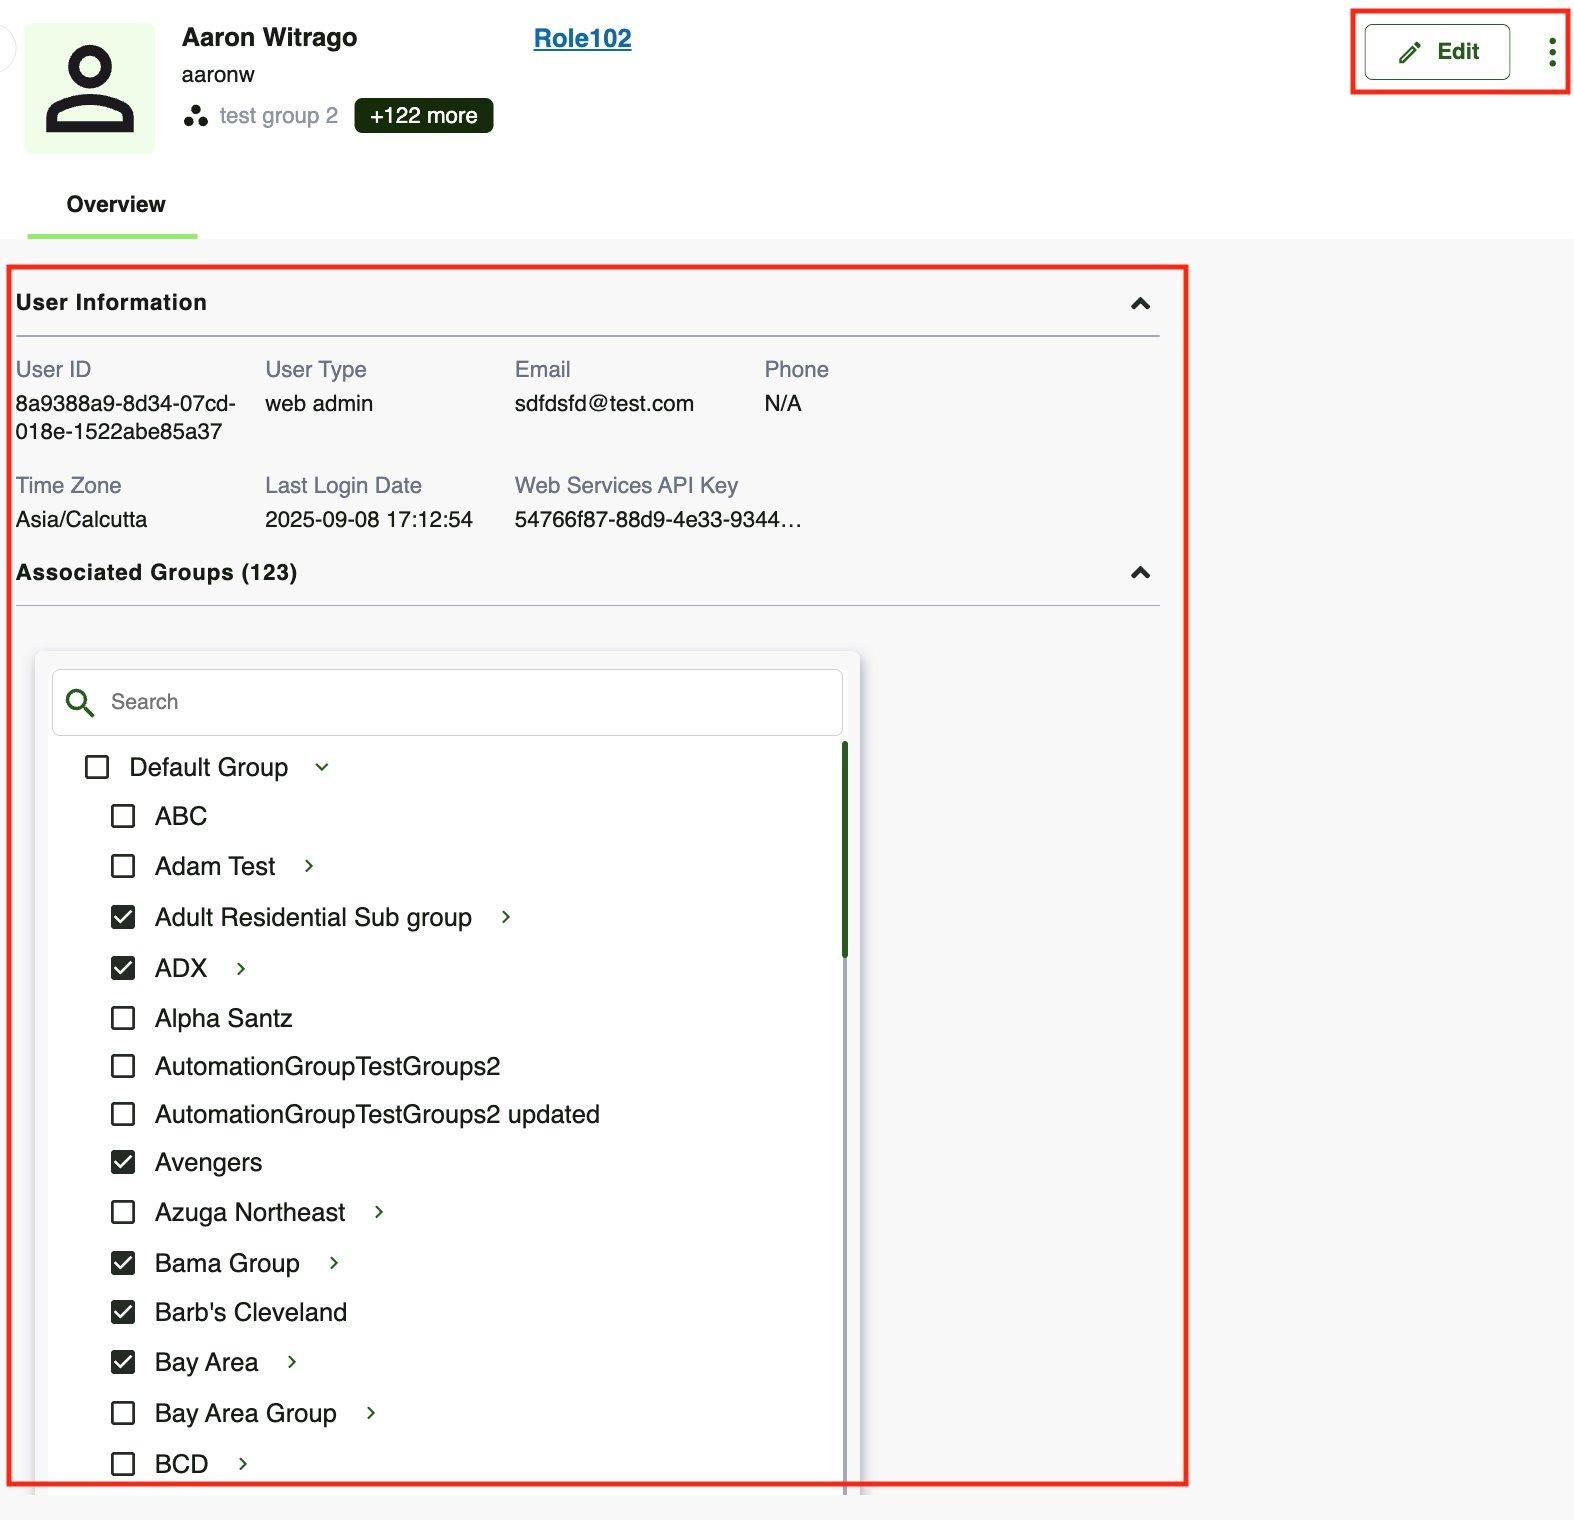
Add Users Workflow
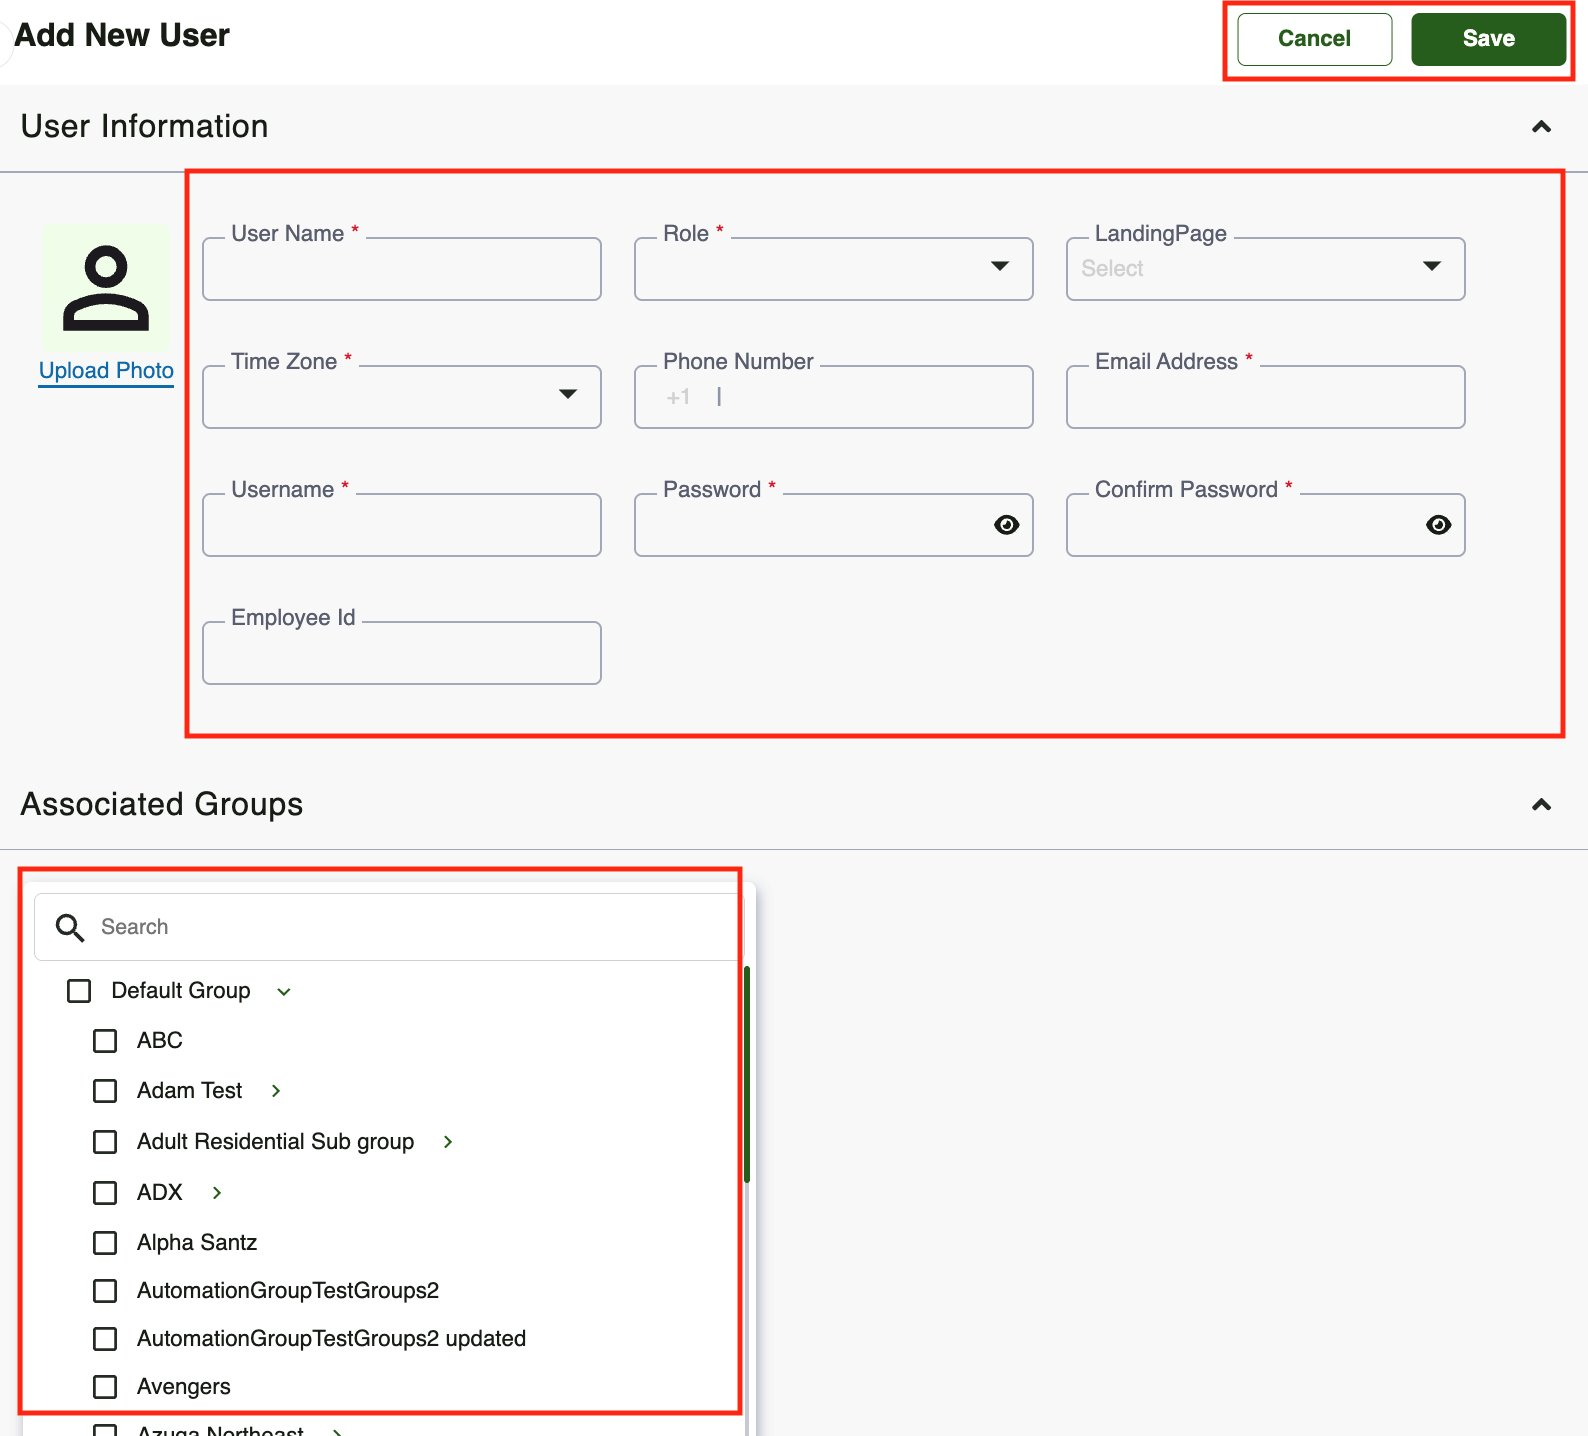
Use the Add New User page to create a new portal user and assign their access role and group permissions. Provide the basic account and contact details, then select the appropriate role and groups.
Steps:
- Click + Add Users
- Enter the required user details in the User Information section
- Select role, time zone, and landing page
- Provide login credentials (username and password)
- Add contact details and employee ID (if available)
- Select associated groups for access control
- Upload a profile photo if needed
- Click Save to create the user account
- Click Cancel anytime to discard changes
For more information refer to - [Customer] User Guide - New Admin
Was this article helpful?
That’s Great!
Thank you for your feedback
Sorry! We couldn't be helpful
Thank you for your feedback
Feedback sent
We appreciate your effort and will try to fix the article