An asset is automatically added to your account whenever the Azuga Customer Care team adds a new asset tracker device to your account. Initially, the system will set the ID of this asset with the serial number of the device. You can edit the fields of this asset by navigating to ADMIN >> Assets.
It is not recommended that you explicitly add an asset in the system since assets are added to your account automatically.
However, if you wish to manually add an asset to your account:
1. Login to the Azuga Fleet Web application.
2. Navigate to the Assets page, under the ADMIN tab.
3. Click Add Asset.
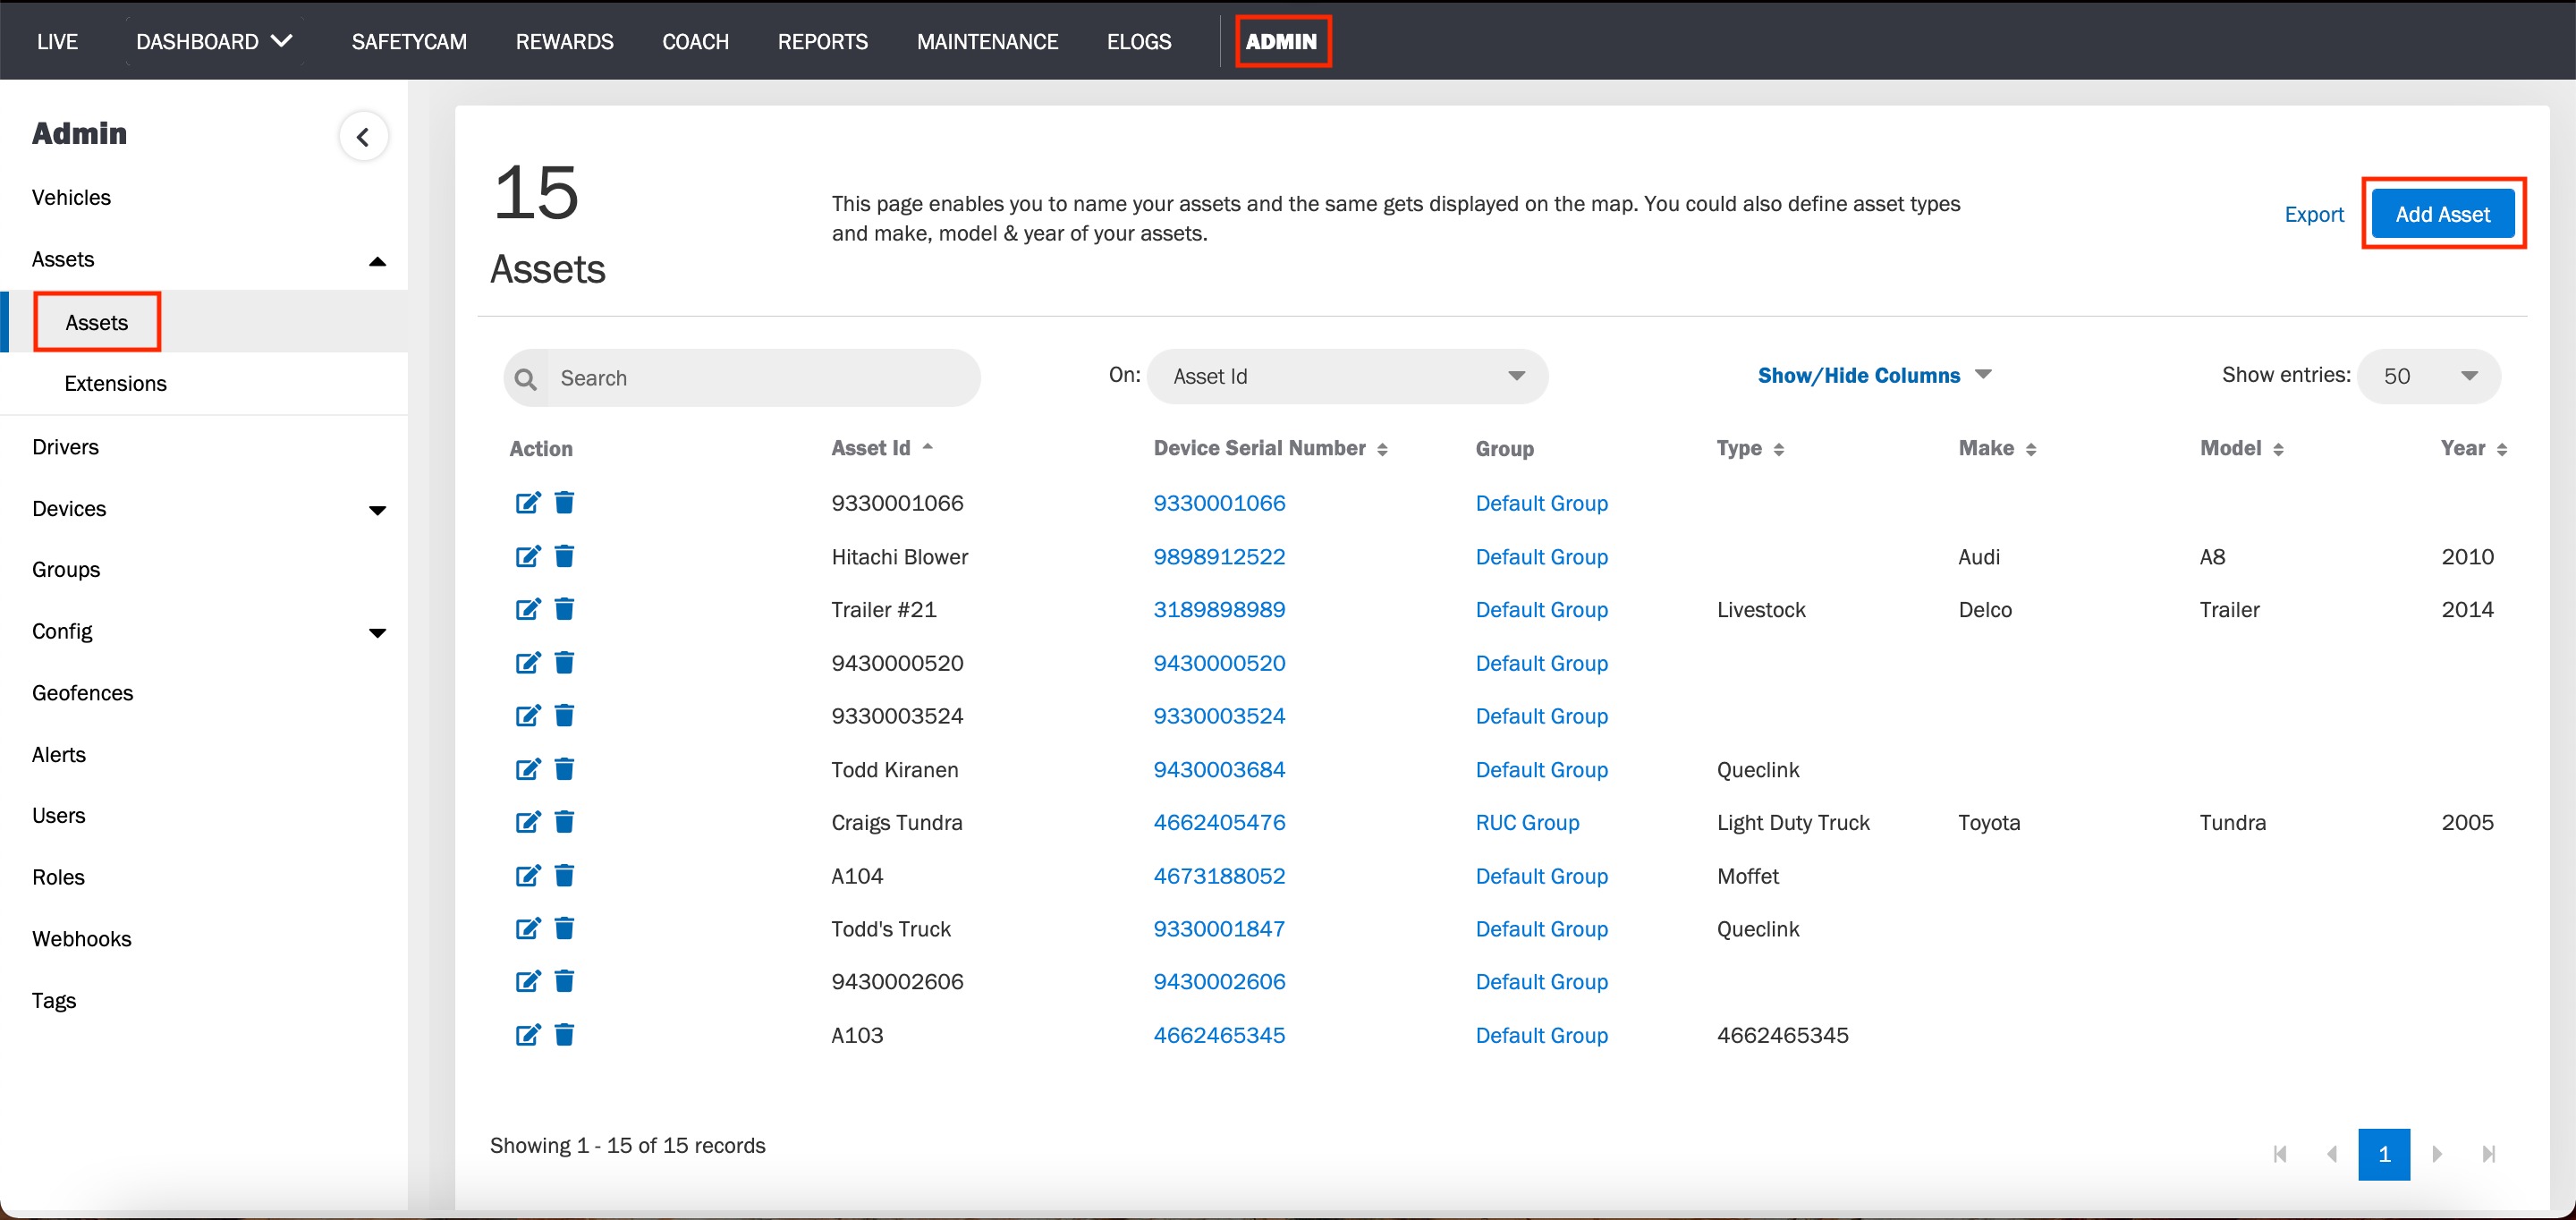
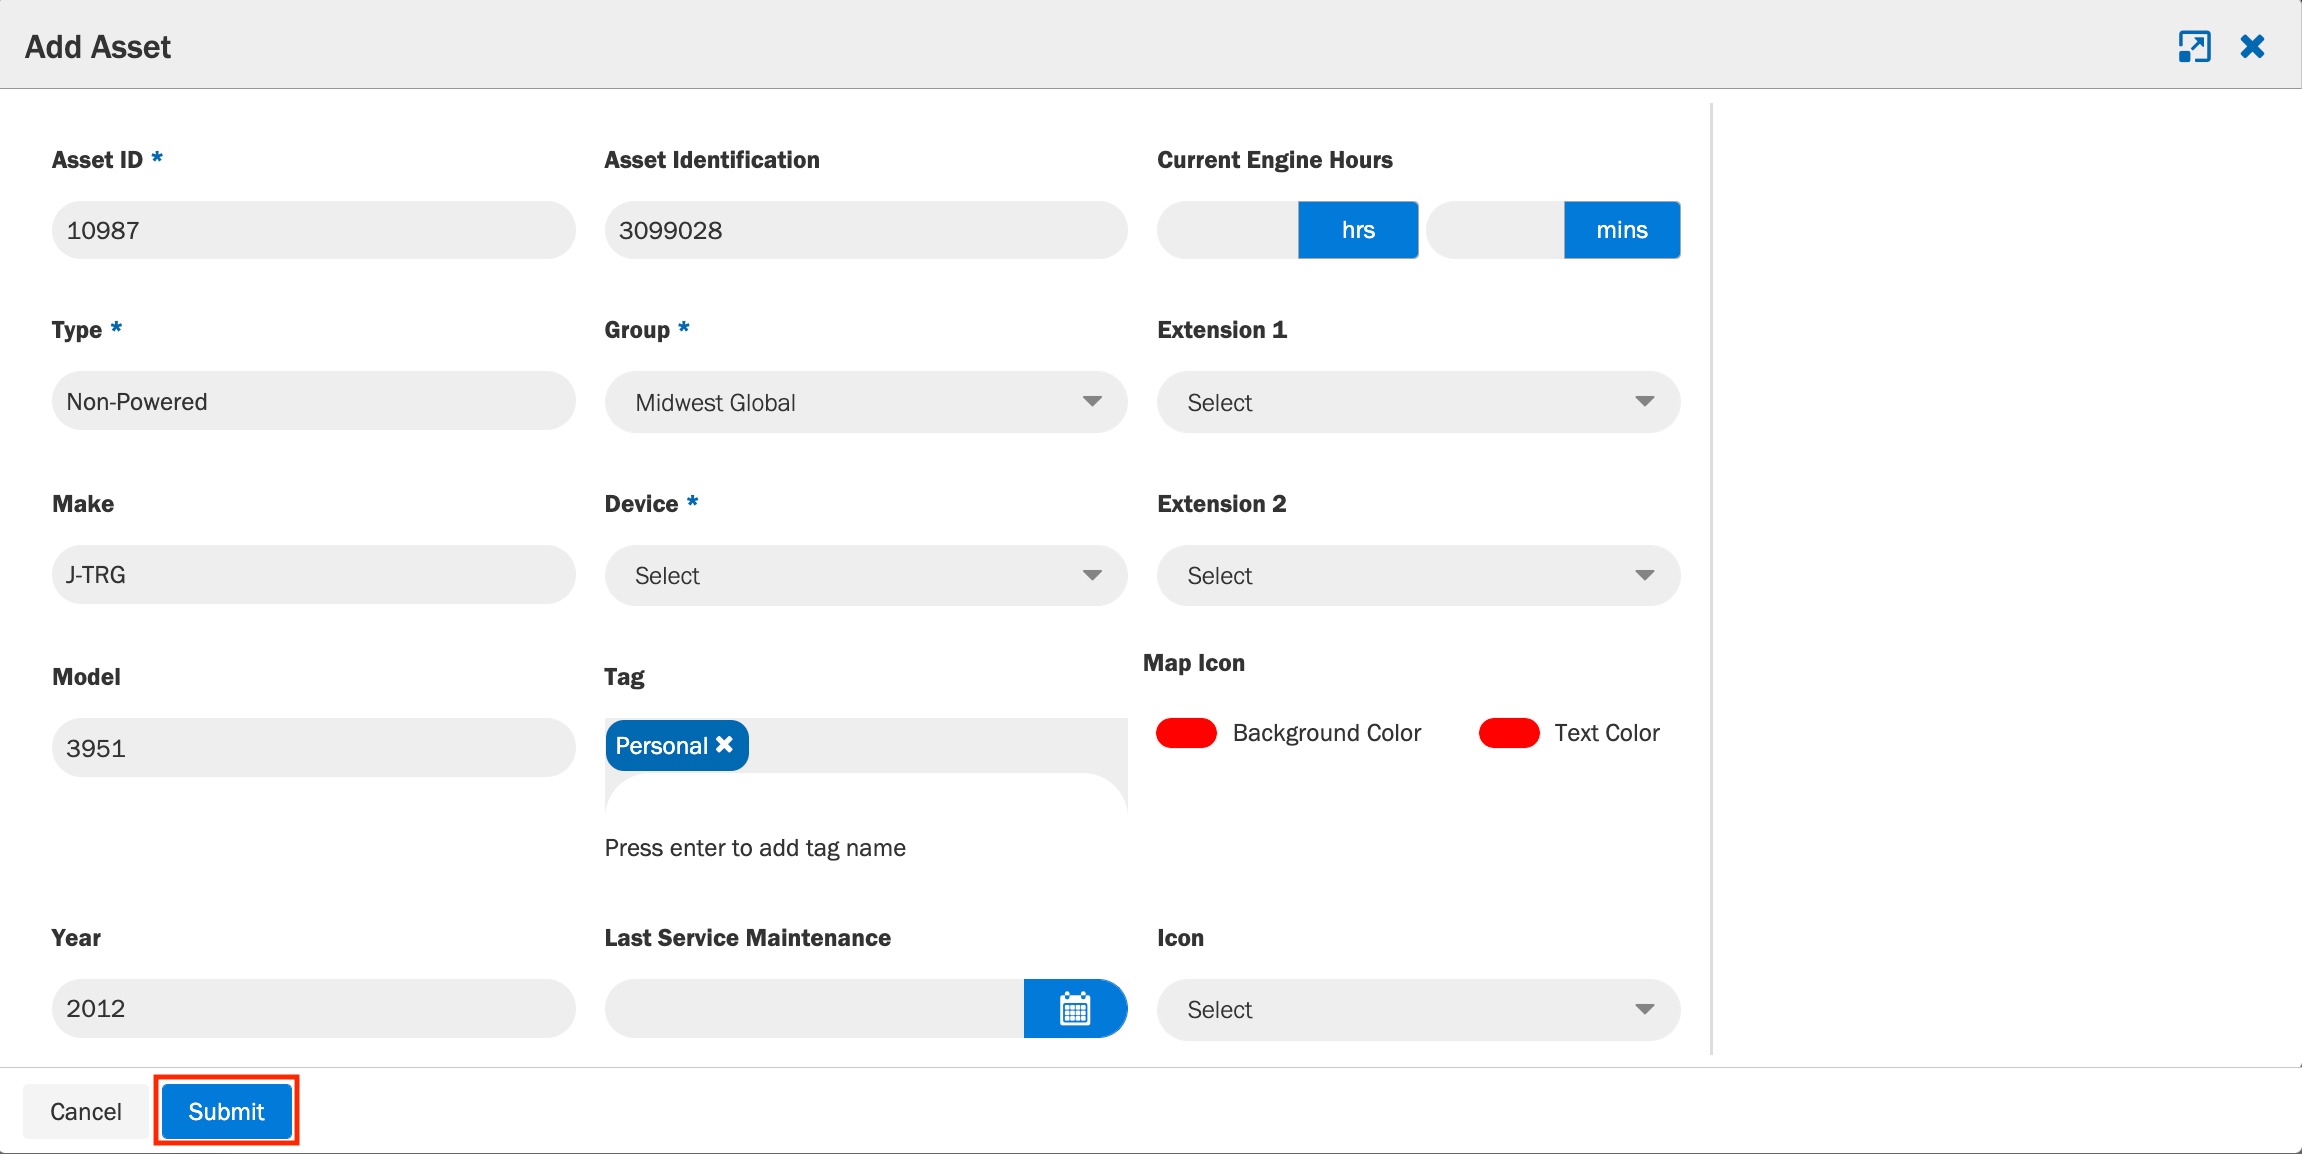
4. Fill out the form with appropriate details.
a. Enter the unique Asset ID.
b. Enter the Type of the asset.
c. Enter the Make, Model, and Year.
d. Enter the License Plate and Asset Identification numbers.
e. Select the asset’s Group.
f. Select the serial number of the device plugged into the asset.
g. In the asset Tag text box. select a tag name to tag an asset. You can add multiple tags at a time by separating each tag name with a comma.
5. Click Submit to save Asset.
Was this article helpful?
That’s Great!
Thank you for your feedback
Sorry! We couldn't be helpful
Thank you for your feedback
Feedback sent
We appreciate your effort and will try to fix the article