1. Write down the serial number of the device and the vehicle name where the device is to be installed. (See the pre-install checklist that is included in the shipping carton).
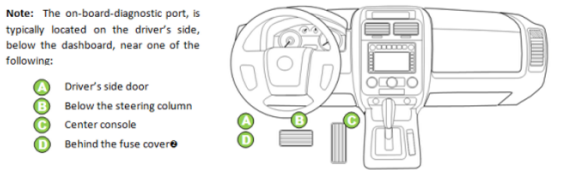
2. Locate the onboard-diagnostic port (OBDII port) of your vehicle and plug the Azuga device into the diagnostic port (refer to the figure below). The port is generally located under the bottom edge of a vehicle’s dashboard (on the driver’s side).
3. Wait for two minutes and start your vehicle.
4. Allow the vehicle to be in an idle state for 2-3 minutes.
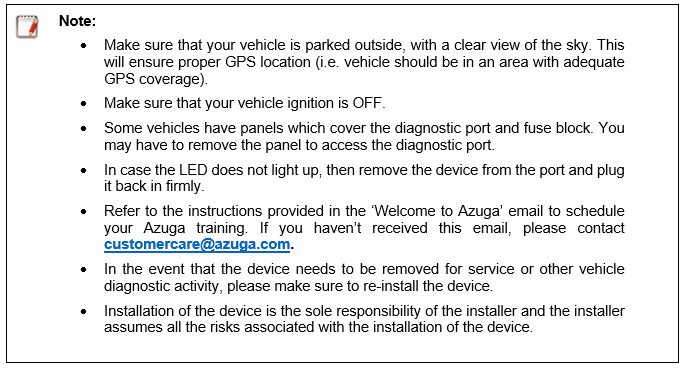
The LED on the device starts flashing, indicating the device’s connection with the vehicle. It also indicates the GPS location fix and communication with the Azuga website. First, the LED will be green indicating the device connection. Then it turns amber, indicating GPS location fix, and finally, it will be red, indicating that the communication has been established. The LED will blink once during subsequent trips and all the trips get logged into our system.
For Detailed Install Instructions : PDF copy of Installation Guide for OBDII
Was this article helpful?
That’s Great!
Thank you for your feedback
Sorry! We couldn't be helpful
Thank you for your feedback
Feedback sent
We appreciate your effort and will try to fix the article