Groups are a great way to organize a set of vehicles present in your fleet. You can create groups based on fleet locations, departments, jobs, etc to easy identification of the vehicles.
Every group has a group administrator. The group admins can only access information about the vehicles belonging to his/her group.
Nesting of groups is also possible. The Default Group is the parent of all groups.
To create a group:
- Log in to the Azuga Fleet Web application.
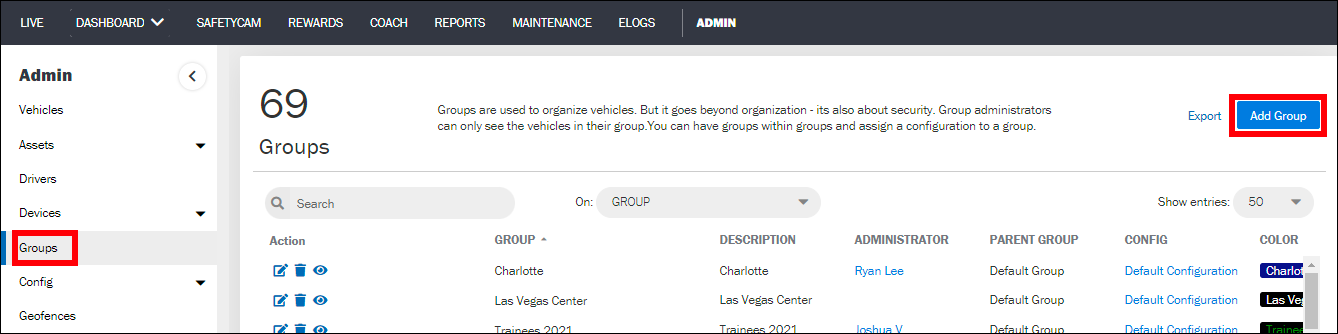
- Navigate to the Groups page present under the ADMIN tab.
- Click on Add Group.
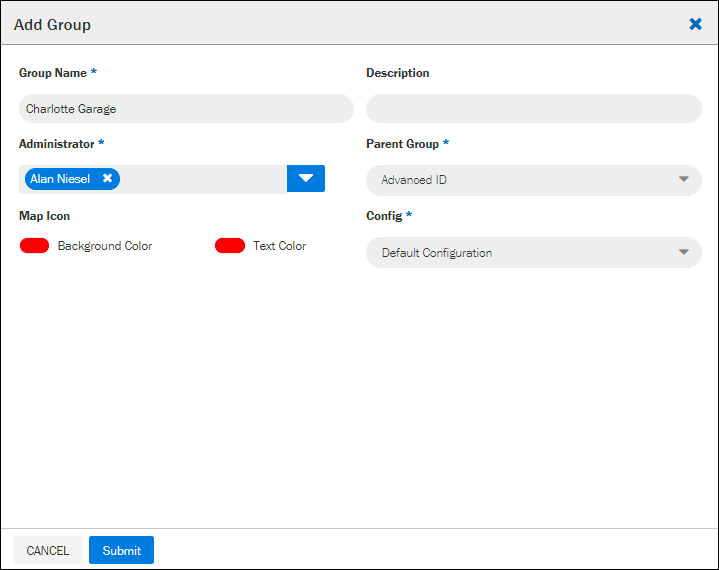
- Fill out the form with appropriate details.
a) Enter the Group Name.
b) Select a group Administrator for this group.
c) Select the Configuration.
d) Enter a short text describing the group.
e) Select the Parent Group.
f) Select the Background Color and Text Color for map labels.
- Click Submit to save the group.
Was this article helpful?
That’s Great!
Thank you for your feedback
Sorry! We couldn't be helpful
Thank you for your feedback
Feedback sent
We appreciate your effort and will try to fix the article